
Silver letters on a dark background. The silver elements shimmer and reflect the light and the letters are slightly raised off the surface to create a relief-like appearance. Foil printed postcards, flyers and business cards are highly visible even from a distance, inviting prospective customers to grab them. In this InDesign tutorial, you will learn how to create the artwork for postcards or business cards with silver foil printing. Moreover, we provide the design of our sample postcard for you to download free of charge.
Have you ever tried to create a silver or gold effect using CMYK colours in a layout program? Then you will know that this method does not yield a realistic effect. This is because the reflection properties of gold and silver are difficult to emulate with ink alone.
How the silver effect is created
Silver foil finishing actually uses real light-reflecting foil. First, a coat of UV varnish is applied to the substrate and the silver foil is then put on top of it. The foil will only adhere to the areas coated with the varnish. This technique adds a silver shimmer to text and logos.
To achieve this, you have to enter specific colour swatch information in your artwork for the print shop and highlight which design elements you want apply the silver foil to.
Please bear in mind that different print shops have different artwork requirements regarding finishing. The following instructions apply to the finishing of prints ordered at Onlineprinters.
How do I create artwork files for silver spot finish?
Contents
Step 1: Create and name layers
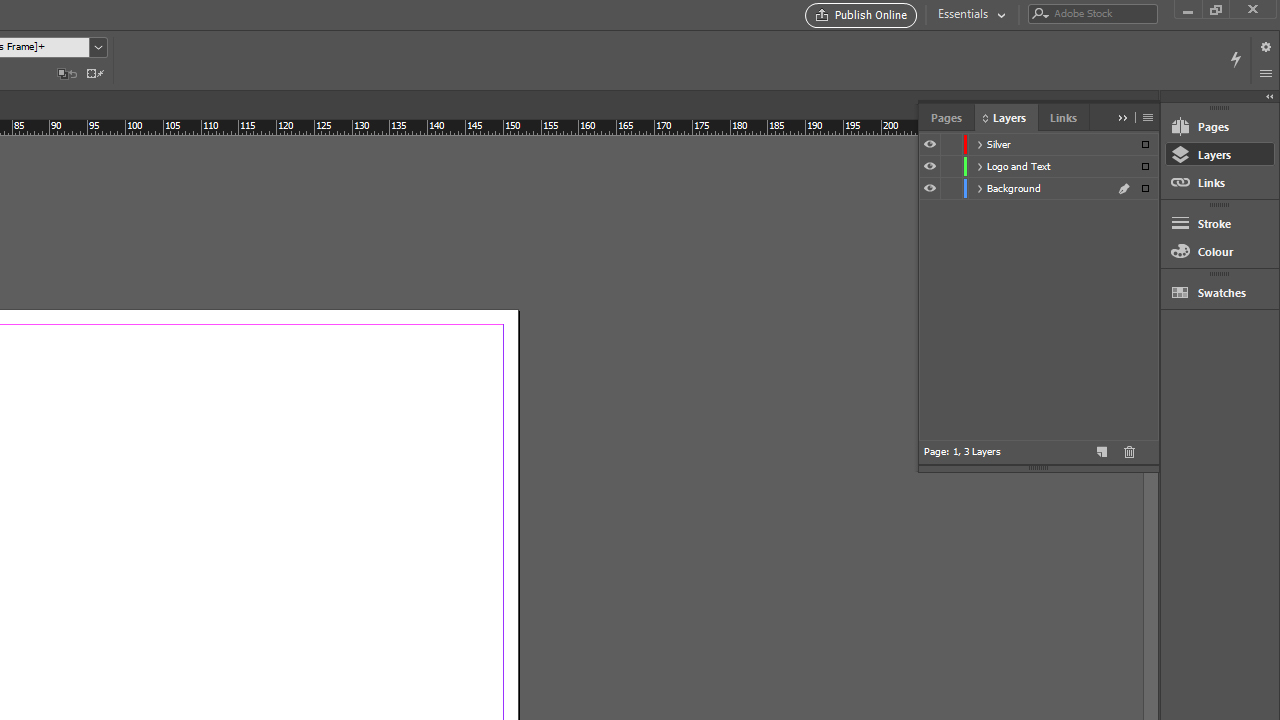
We want the background of the postcard to be almost black to really make the silver effect pop out. To do so, go to the Layers window and rename the existing layer to “background”. Use the new layer icon to create two more layers which you name “logo and text” and “silver“, respectively.
Step 2: Create the background
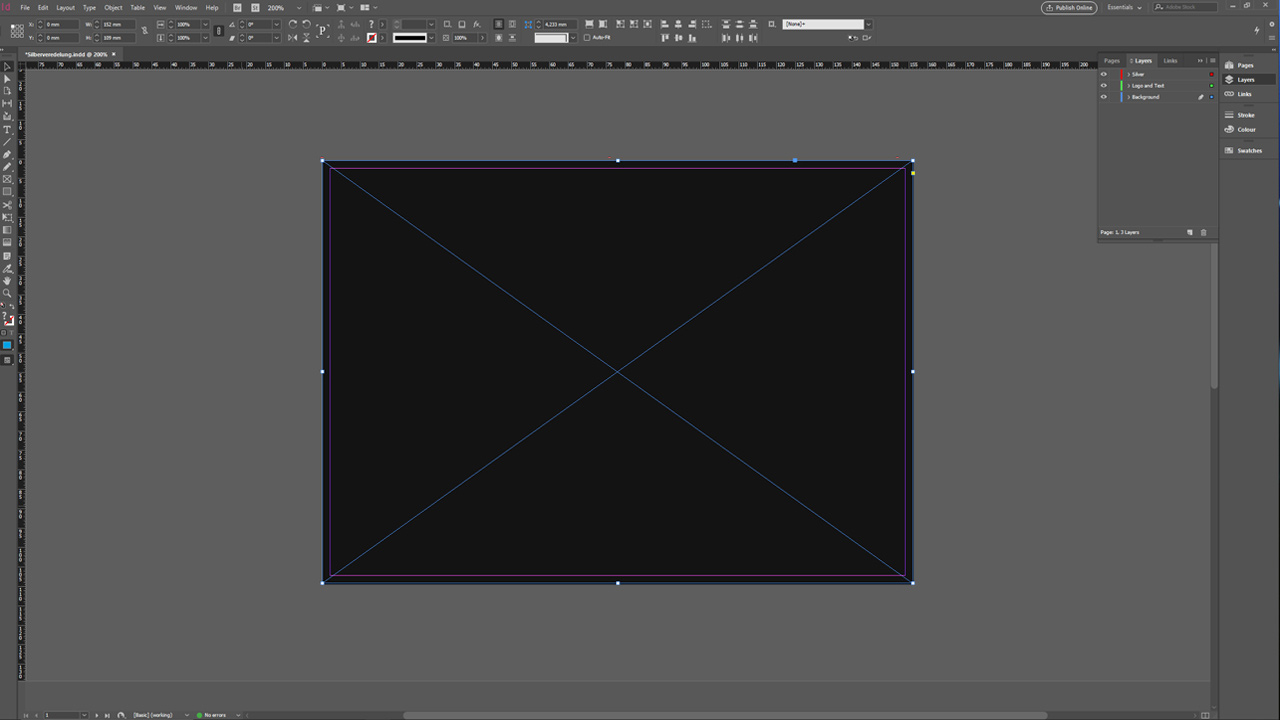
Now choose the Rectangle Tool and click on a free space in your project. A new window pops up in which you can define the dimensions of the new rectangle. Enter 152 mm for the height and 109 mm for the width of your postcard. Confirm the settings with OK and move the newly created frame to the desired location using the Selection Tool. Then open the Colour Themes and choose “black”. Additionally, set the tonal value to 98 percent. You are already done with the background!
Step 3: Add logo and text
![]()
Please note that the logo is displayed in white for visualization purposes only.
In the next step, we will add the ribbon image and the text. We previously created these elements in Adobe Illustrator. You can also import your text or logos from any other program into InDesign by selecting all elements using the shortcut CTRL + C and pasting them in InDesign using CTRL + V at the “Logo and text” layer.
Step 4: Create and name a colour swatch

After you have positioned the logo and text, you can now add the silver effect. For this purpose, first select the layer “silver“. Now copy all previously inserted elements and re-paste them via Edit > Paste in place. Now reopen the Colour Themes and create a new colour using the New Swatch button. Double-click this colour to open the Swatch Options dialog box.
Now enter the settings specified by the print shop. In our example:
- Swatch Name: “silver”
- Colour Type: Spot
- Colour Mode: 100 % Cyan
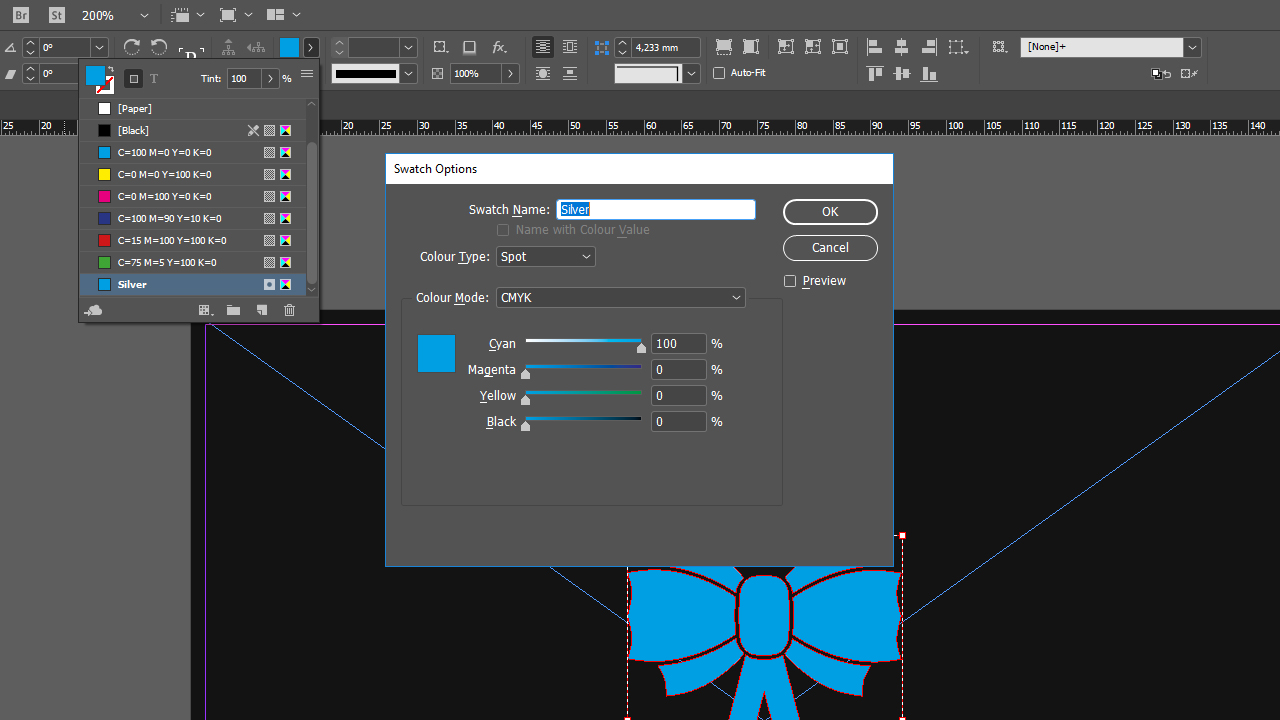
Make the setting as shown in the above screenshot and confirm with OK. Your pasted elements should now be displayed in 100 % cyan. Don’t worry, the cyan spot colour will not be visible after printing, because it will be overprinted with the silver foil.
Step 5: Verify the result in the separations preview
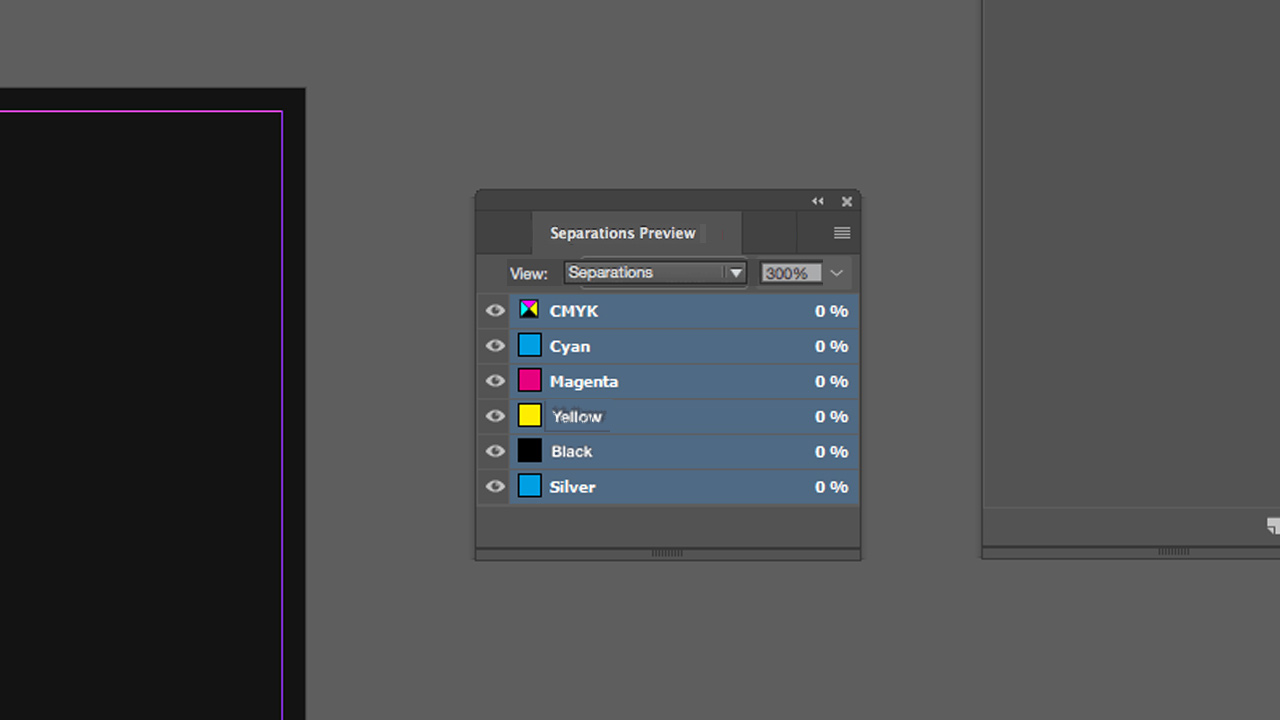
Finally, check whether you have made all settings correctly. To do so, go to the separations preview at Window > Output > Separations Preview. Separation is disabled by default in the window that pops up. Click the drop-down menu to select the Separations tab and enable the individual colour channels. The colour channel “silver” is now displayed here. When you click this colour channel, the background should appear white and all elements to be silver-finished black. If this is the case, you have done everything correctly and you can export your project and upload it to the print shop.
For a good print quality, your design elements should be dimensioned as follows:
- Line width: min. 3 pt (1.06 mm)
- Font size: min. 14 pt
- Minimum distance: 3 pt (1.06 mm) to each other.
If you choose other finishing options for your printed pieces such as relief varnish, a spot colour or UV coating, you also have to provide specific information in your artwork for the print shop and create a so-called 5th colour.
Download the free template
We provide the artwork for the “A gift for you” postcard for silver spot foil free of charge. Just download the INDD file and order your custom-sized postcard.
Download postcard as INDD file.
Credits:
By media designer Christoph Ullrich.