
Edit your photos to create stunning images and upgrade holiday shots or smartphone photos with the sharpening function. In this tutorial, you will learn how to use the high pass filter to sharpen photos you have taken and find the optimal sharpness level for your subject.
Imagine you have taken great holiday shots with your reflex camera or smartphone to find your photos slightly blurry back home. What to do now? Going back to take new pictures is obviously out of the question. So you have to sharpen your photos. The easiest way to do this is using filters in Photoshop. The program includes many sharpening tools, but the high pass filter is one of the most effective methods to get much more sharpness out of your photos with just a few clicks.
Sharpening photos: Why the high pass filter?
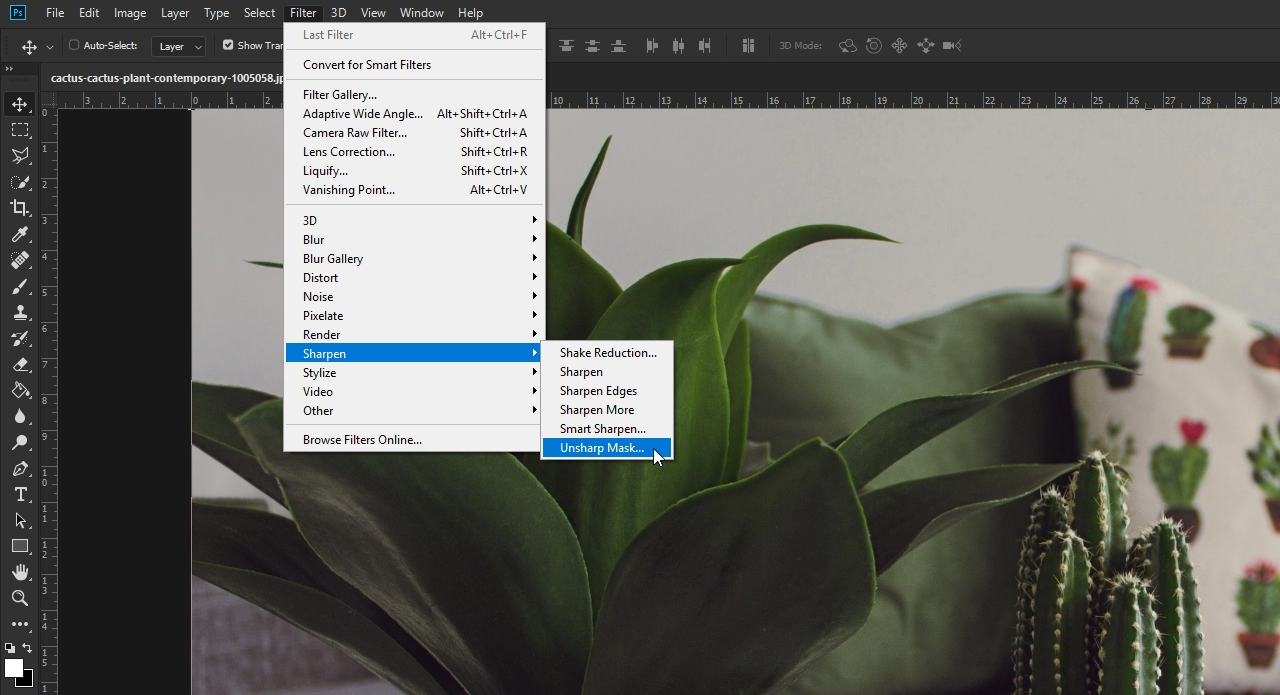
If you want to sharpen photos, Photoshop provides various filters. To access them, choose the Filter menu and then Sharpen. Some filters such as “Sharpen” or “Shake Reduction” calculate the corrections automatically. Filters like “Smart Sharpen” and “Unsharp Mask” include various parameters to make detailed settings. The High Pass filter is a good compromise to sharpen images because it allows the user to adjust the amount of sharpening in a dialogue box.
Step 1: Duplicate the original photo and convert the duplicate to black and white
To sharpen a photo, first create a duplicate of the original photo. Right-click the image layer and select Duplicate Layer. If necessary, you can rename the image layer in the Layers panel for a better overview. Just double-click the name of the duplicated layer and rename the layer, e.g., to “Sharpening”. Because we want to increase only the sharpness level in the photo, the Sharpening layer is converted to black and white in the next step.
If we applied the high pass filter to the coloured photo, the sharpening effect would also work, but it would be much more difficult for Photoshop to detect the outlines correctly. In some cases, the colours of the photo could change as a result.
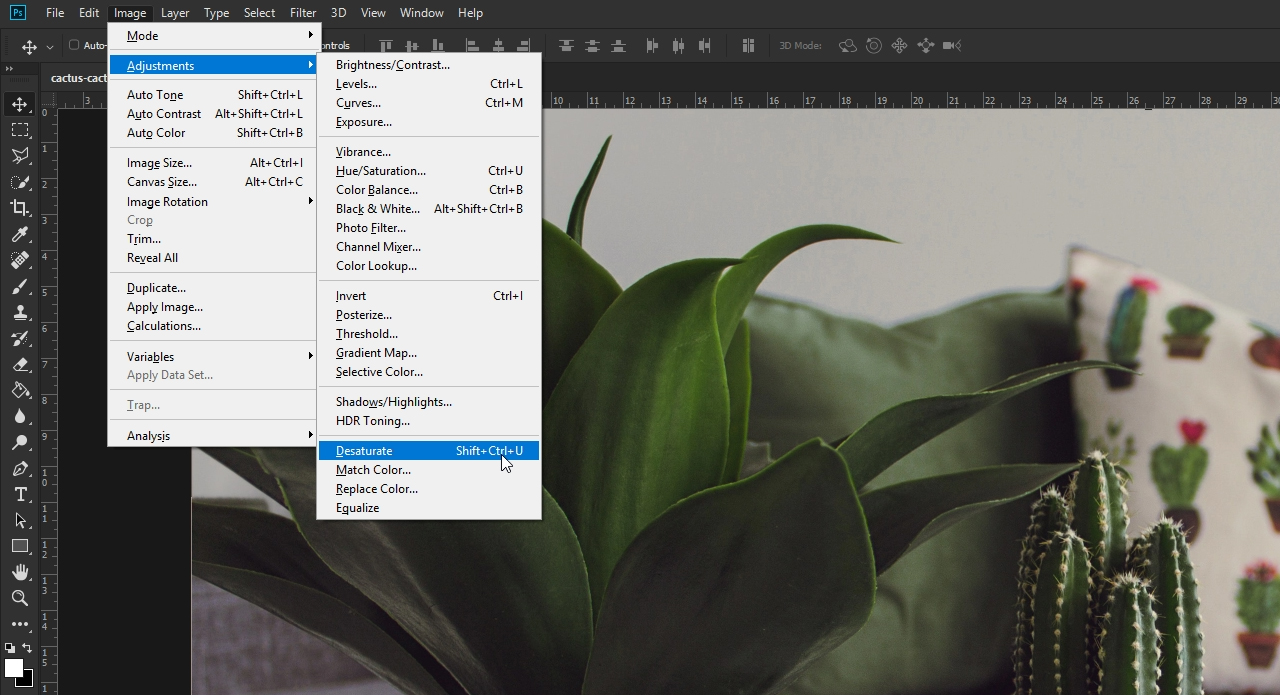
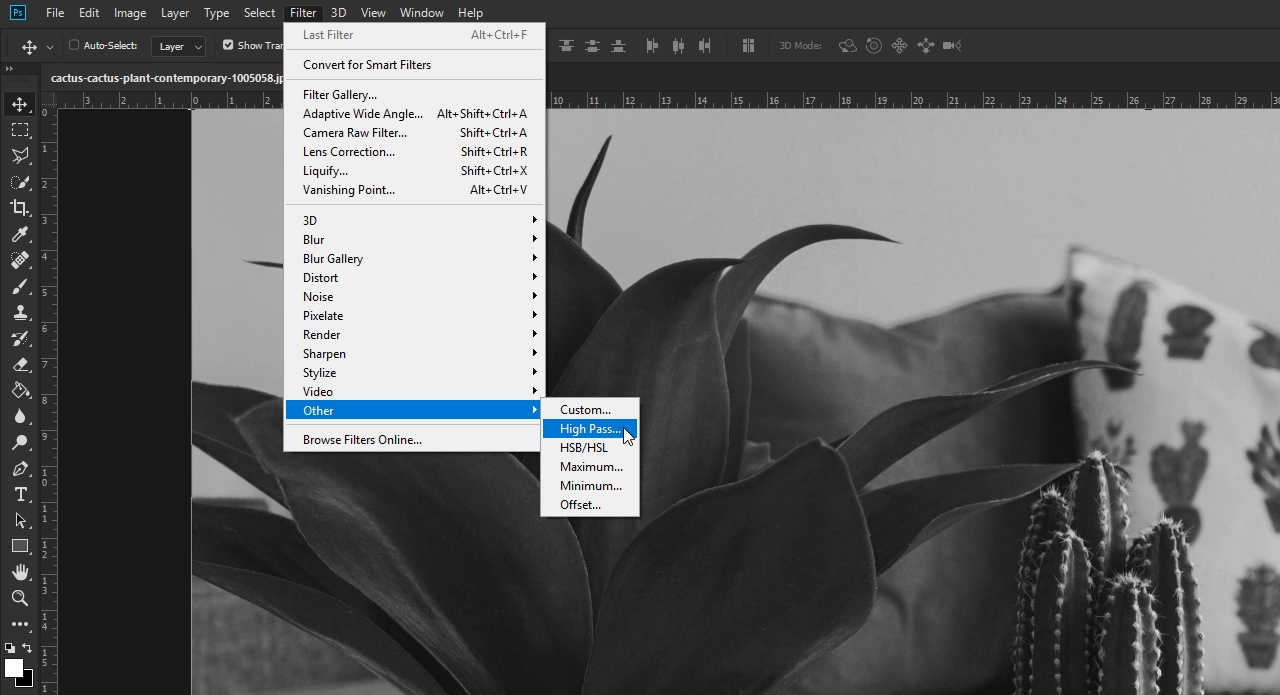
To convert the layer to black and white, click Image, then Adjustment and Desaturate. You can now apply the high pass filter to this black-and-white layer. You will find the high pass filter in the Filter menu > Other and High Pass.
Step 2: Adjusting the high pass filter correctly and sharpening photos
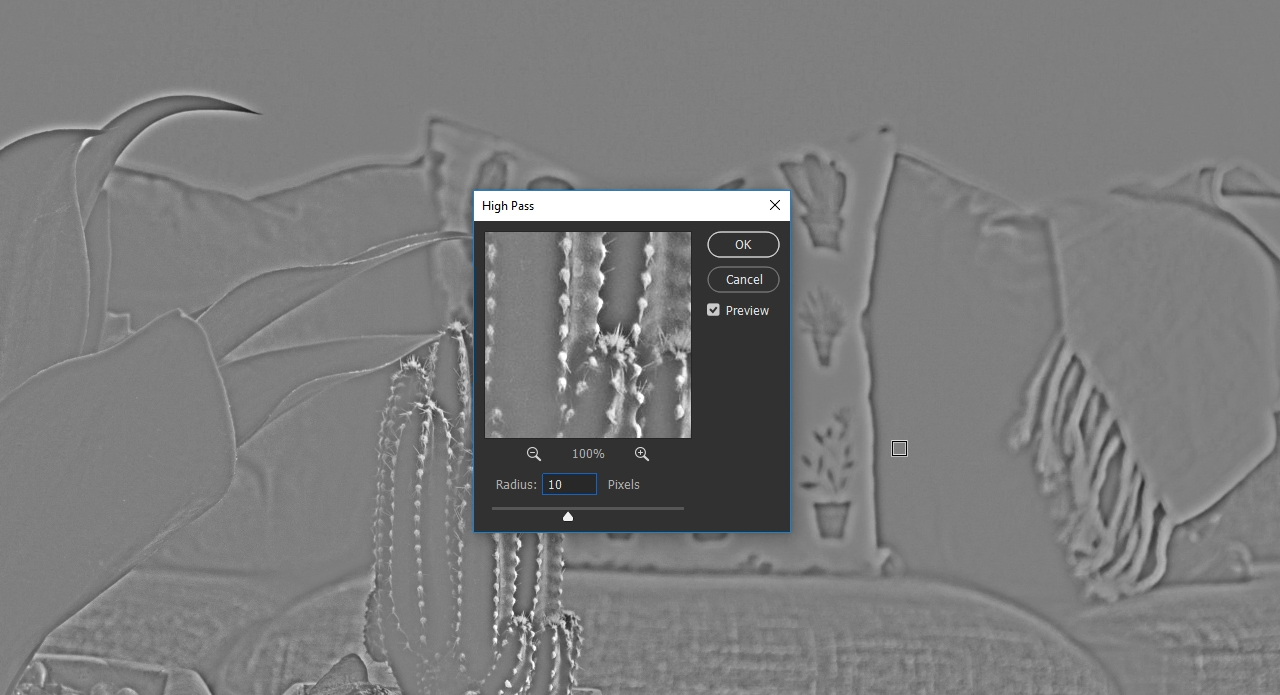
The High Pass dialogue box has a simple layout. Photoshop has correctly detected the outlines after applying the filter and you can now shift the slider to determine the intensity of the outlines. You also see a highly magnified view in the preview window.
When using the high pass filter to sharpen images, a value between 5 and 15 is usually a good sharpness setting.
If you set the value too high, the photo will still appear sharp but it will be grainy and halos will form around the edges in the final photo. This would create a very unrealistic effect for the photo. In the example, we chose the value 10 and closed the dialogue box by clicking OK.
Step 3: Combining layers

To apply the sharpness to the original photo, all you have to do is change the blending mode of the sharpening layer. To do so, click the drop-down menu in the layers panel and select the “Overlay” blending mode. In some cases, the modes “Soft Light” and “Hard Light” might yield a better result. Just try out the different blending modes to find out which works best for your photo. At first glance, it seems as though nothing much has changed compared to the original photo. But if you hide and show the sharpening layer again, you will noticed that it is much sharper now. In the example, this is particularly evident in the flower pot with the visible soil and in the pebbles in the left flower pot. As a convenient side effect of the high pass filter, the foreground with the plants is brought into sharper focus which creates a starker contrast to the background.
Credits:
Tutorials (text and video) and design by media designer Christoph Ullrich.