
Tedious manual retouch to remove unwanted content is a thing of the past. The new Photoshop version CC 2019 provides a new Content-Aware Fill workspace. In this tutorial, you will learn how to use it to eliminated undesirable content from your photos.
Photoshop currently provides a wide range of easy-to-handle tools to quickly edit unwanted areas of a photo. One option is to use the Content-Aware Fill function to remove an unwanted object from a photo with just a few clicks.
The Content-Aware Fill tool in older Photoshop versions
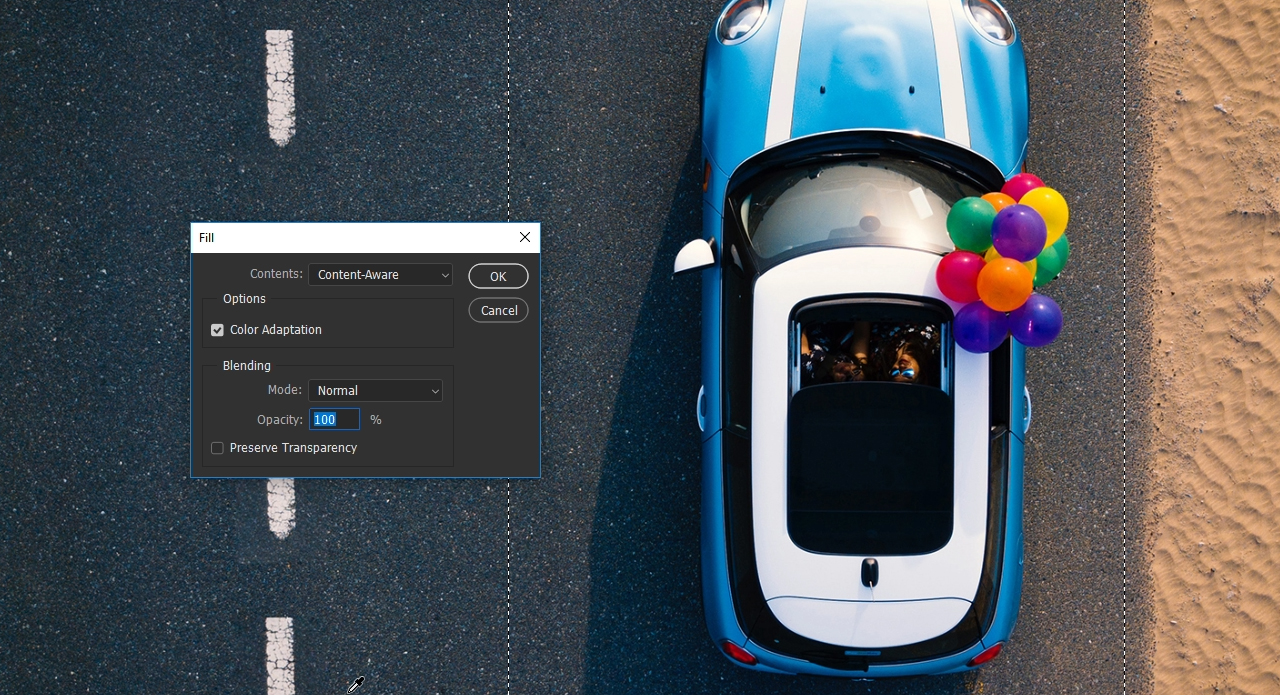
The Content-Aware Fill function in previous Photoshop versions was already popular with users as it often delivered surprisingly good results. Removing an object from a photo was possible with a few mouse clicks. First you had to select the object using the Selection tool, click Edit > Fill. The Content-Aware Fill tool then automatically removed a selected area and replaced it based on the pixels around that object.
In some cases, the tool did an amazing job and it was impossible to tell any difference to the original photo. In others, the results were not so great. The problem was that you couldn’t tell Photoshop which areas to sample or how to generate the fill. As a result, the selection was filled with image content that did not actually belong there. To avoid this problem, the Content-Aware Fill tool has been further enhanced in Photoshop CC 2019.
The advantages of the new workspace
The new Content-Aware Fill workspace is a useful addition to the existing function. Previously, when analysing the image, Photoshop always sampled the whole image for possible source image information. This is also the reason why artefacts occurred occasionally.
The new Content-Aware Fill function enables you to define the areas which Photoshop should sample. Moreover, the areas to be used can be scaled, rotated or mirrored automatically for best results. If the result is still not ideal, you can further refine the selection using the Color Adaptation option. The new workspace features a clearly structured overview, showing the original image and a preview of the new image side by side.
Using content-aware filling in Photoshop CC 2019:
Step 1: Select the object and open the Content-Aware Fill workspace
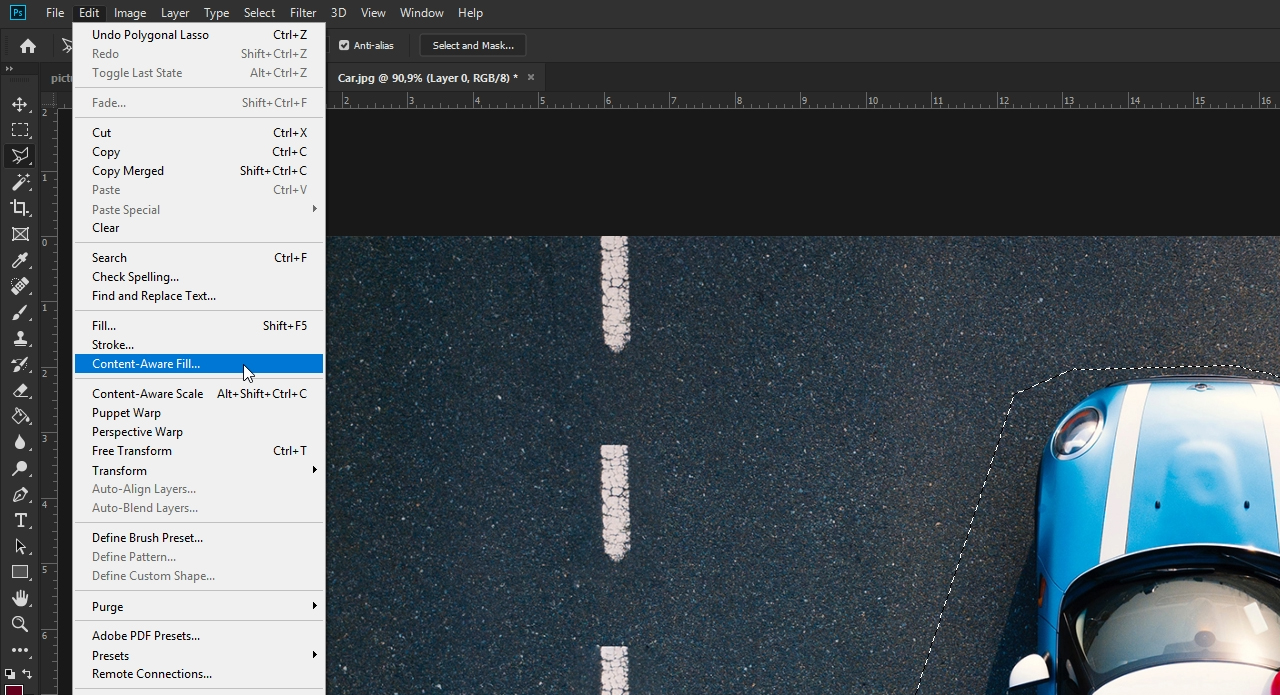
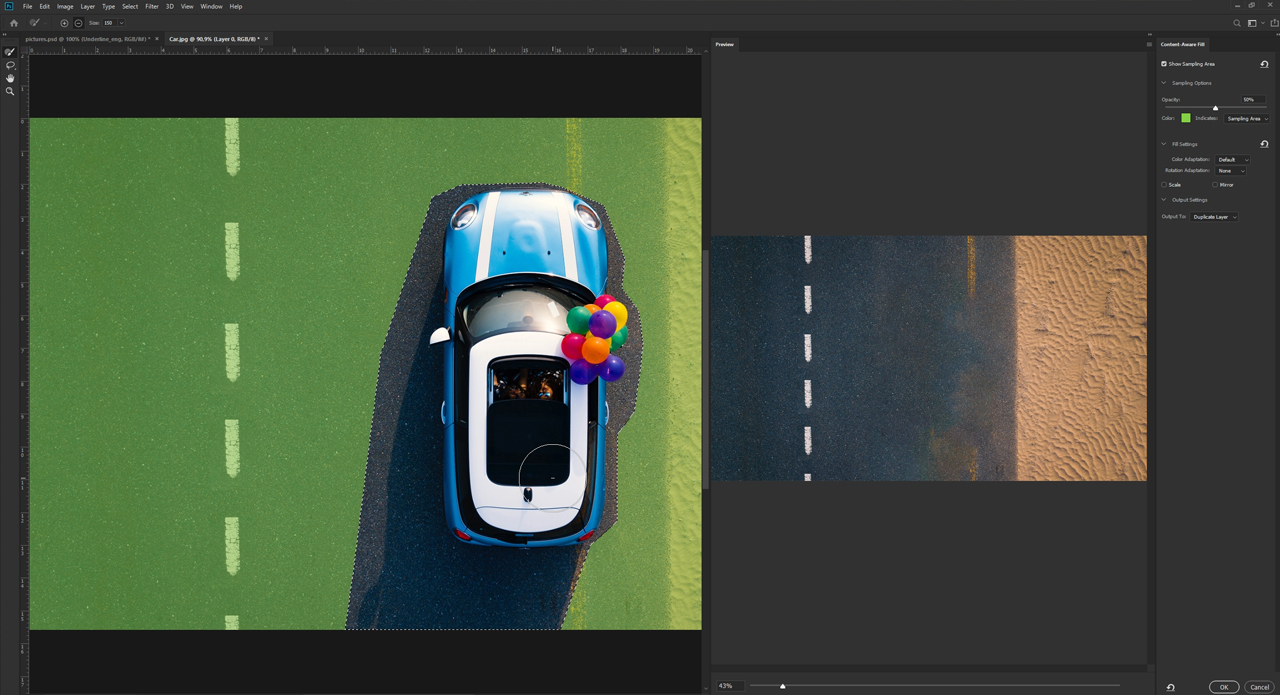
In the example, we want to remove the vehicle in the street and generate a fill for the yellow road marking. First use the Lasso tool to draw a selection around the vehicle. Make sure to preserve as much as possible of the yellow road marking because this is the area you want to use for the fill later on, giving Photoshop more image data to work with. Once you have made your selection, click Edit > Content-Aware Fill. The new workspace opens, showing the original photo in the left window and the edited preview in the right window.
Step 2: Excluding source areas from sampling
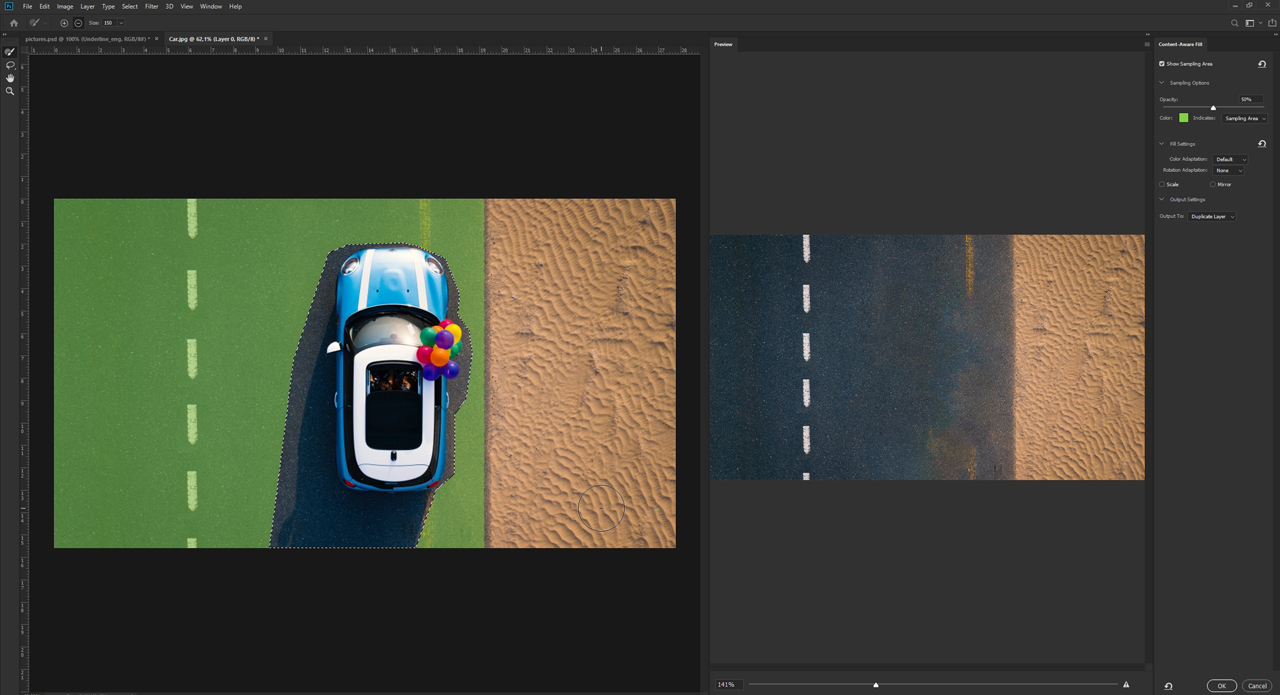
A green overlay covers the areas not included in your selection. Photoshop uses this area to sample pixels to generate the fill. To further enhance the street, you can remove the beach from the source. To do so, move the mouse over the section of beach, and holding down the left mouse button, draw over the area you want to remove. This works similar to the Eraser tool. Once you release the left mouse button, you will see the newly generated photo in the preview window.
Each time you change the original photo, it will be resampled based on the available image information. If you have accidentally removed too much content, press the Alt key, and holding down the left mouse button , move over the area you want to restore as a possible source area.
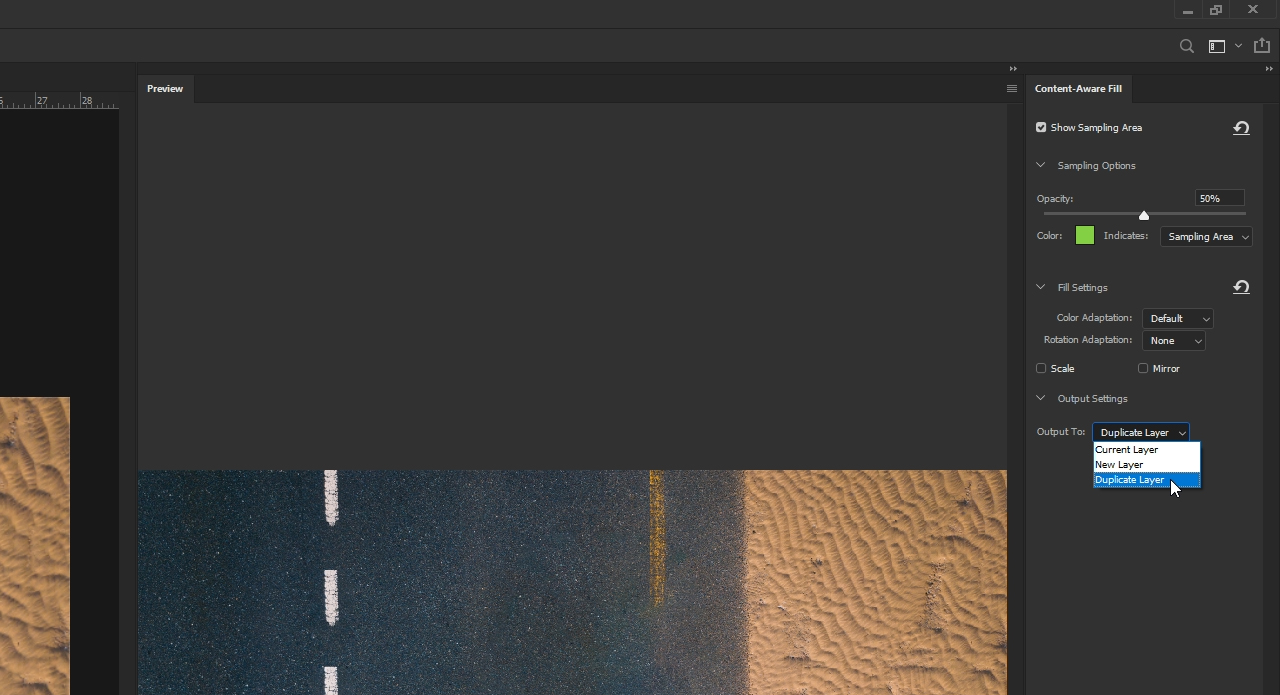
Before clicking OK to confirm the workspace settings, you can choose between different output settings. You can output
- the edited area,
- the edited original photo or
- the original photo together with the edited area as a new layer.
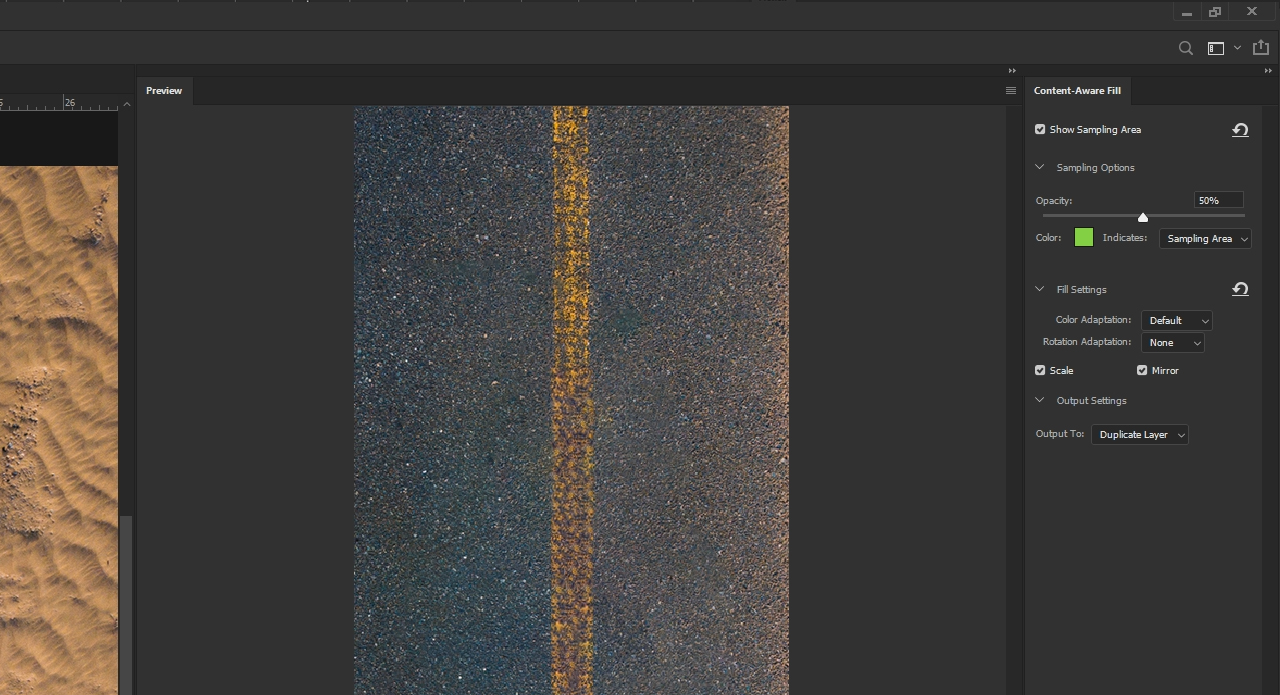
Step 3: Fill the yellow road marking
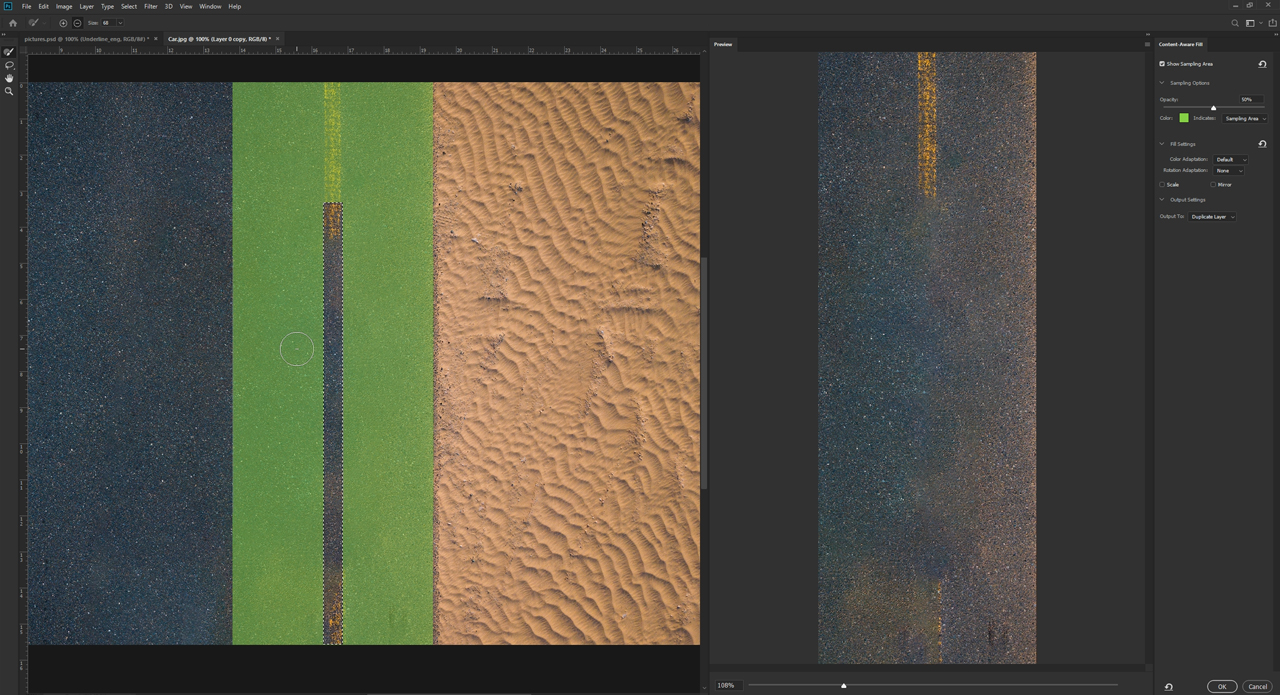
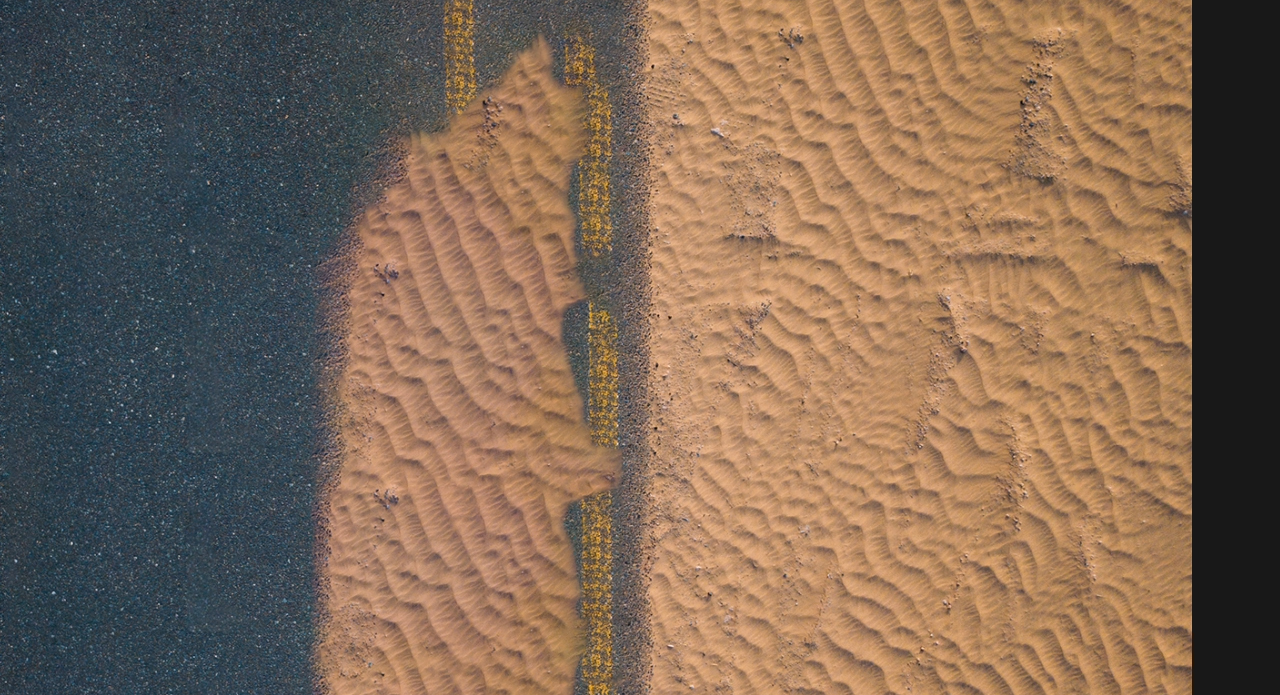
The yellow road marking is missing in the area previously occupied by the car. You can now apply Photoshop’s Content-Aware Fill function to complete the image information of the road marking.
First choose the Selection tool and drag out a selection from the place where the road marking is intact. Make sure that the selection is as wide as the yellow road marking and leave a bit of marking at the top unselected. You can draw the selection down to the edge of the photo. Subsequently, click Edit > Content-Aware Fill again. You want Photoshop to use only the remaining strip of road marking at the top as a source. So remove all other areas that might be included as source data.
Additionally, hold down the Shift key to create a straight line.
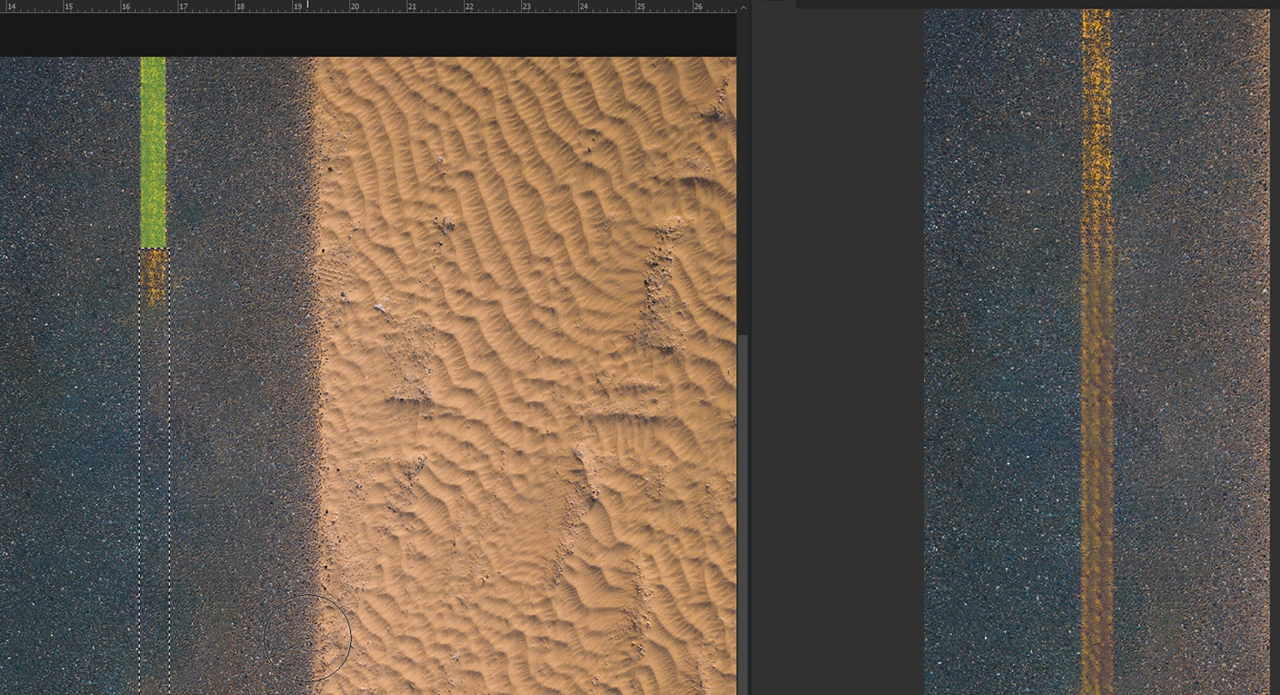
Once only the yellow road marking is left as source area, a preview of the complemented yellow road marking is displayed. But the result is not yet ideal. Change the Fill Settings to rotate, scale or flip content or adapt the colours for a better match.
Just try out different methods to yield the best result. In this case, we get the best outcome through a combination of scaling and mirroring content.
Credits: Tutorial and design by media designer, Christoph Ullrich.