
The type area creates a specific impact of the printed material or screen layout. So when you start your design, it is wise to give some consideration to the type area and the principles of page layout. In the following, we will explain the different methods and present free templates for download.
Page layouts can take different forms and styles from a luxury brochure printed on glossy art paper with plenty of whitespace to advertise deluxe bathrooms or the weekly ad flyer from your discount supermarket crammed to the edges with text and photos on low-cost newsprint.
The impact of the design is influenced by many aspects such as colour, texture, imagery and typography as well as the amount of whitespace inside and outside of the layout.
Each layout is based on a background frame which includes the type area of the page or screen. This area is called type area or print space and has a great impact on how the design is perceived – whether it is designed intentionally or not. Before getting started with the layout, you should hence give some thought to the size and positioning of the type area and the printable area.
Article overview
- Different type areas
- The Golden Ratio in detail
- The line or diagonal construction
- Simple sequence of numbers
- The 9×9 grid
- The design grid
- An example
- Design grid with InDesign
- Type area and ads
>>> Free type area templates for download <<<
An overview of page construction methods
- The Golden Ratio
Golden ratio refers to the classic method that goes back to the Renaissance. The Golden Ratio can be used to define the proportions of designs and structures as well as to determine the type area or select the paper size. The Fibonacci number sequence is closely related to the Golden Ratio. - The line construction (also: diagonal construction)
The line construction uses diagonals which seem awfully mathematically at first. But with some practice, the method is a good alternative to the Golden Ratio. - The simple sequence of numbers
The margin proportions are determined using the numerical sequence 2:3:4:5 or 2:3:4:6. - The 9×9 grid
The 9×9 grid is another effective means of reaching your goal quickly and easily. However, the result is not readily scalable.
Page construction basics
We perceive an impression of spatial harmony and balance when there is more whitespace below objects than above objects. Thus, the perceived, harmonic visual centre is always a bit higher than the calculated centre. We will account for this fact in each of the construction types.
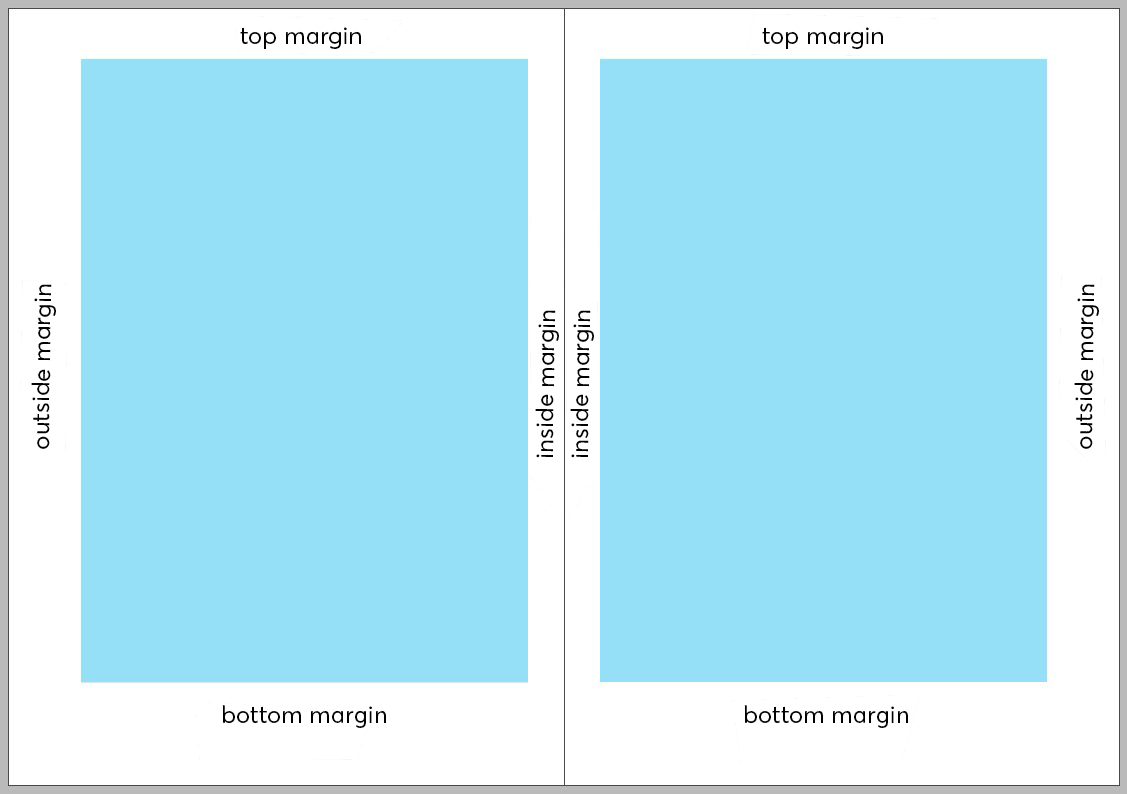
The type area of a single page is usually located horizontally in the centre. For multi-page documents, you have to take into consideration that the reader will also look at two facing pages and thus the free space inside, the so-called inside margin has a double impact. Therefore, the inside margin of double-sided documents is always about half as wide as the outside margin. Also there is the top margin, i.e., the free space above the printed area, and the bottom margin at the lower edge.
Page construction with the Golden Ratio and Fibonacci
We encounter the Golden Ratio as the rule of proportionality in architecture, painting, sculpting and nature. It helps us divide areas and distances into harmonious proportions. Also the relationship between uppercase and lowercase letters is often based on the Golden Ratio. If a line segment is divided into two lengths such that the ratio of the segment’s entire length to the longer length is equal to the ratio of the longer length to the shorter length, then the segment has been divided into the Golden Ratio.
The Fibonacci Sequence is closely related to the Golden Ratio, and to make things easier, it can be used to determine the type area based on the “divine proportions”. The Fibonacci Sequence is 1, 1, 2, 3, 5, 8, 13, 21, 34 etc. – such that each number is the sum of the two preceding ones. Example: 5 added to the preceding 3 equals 8.
Now let’s apply the number sequence to a double-sided page layout. Strictly speaking, it does not serve to identify the type area here but to define the margins and the resulting print space proportions.
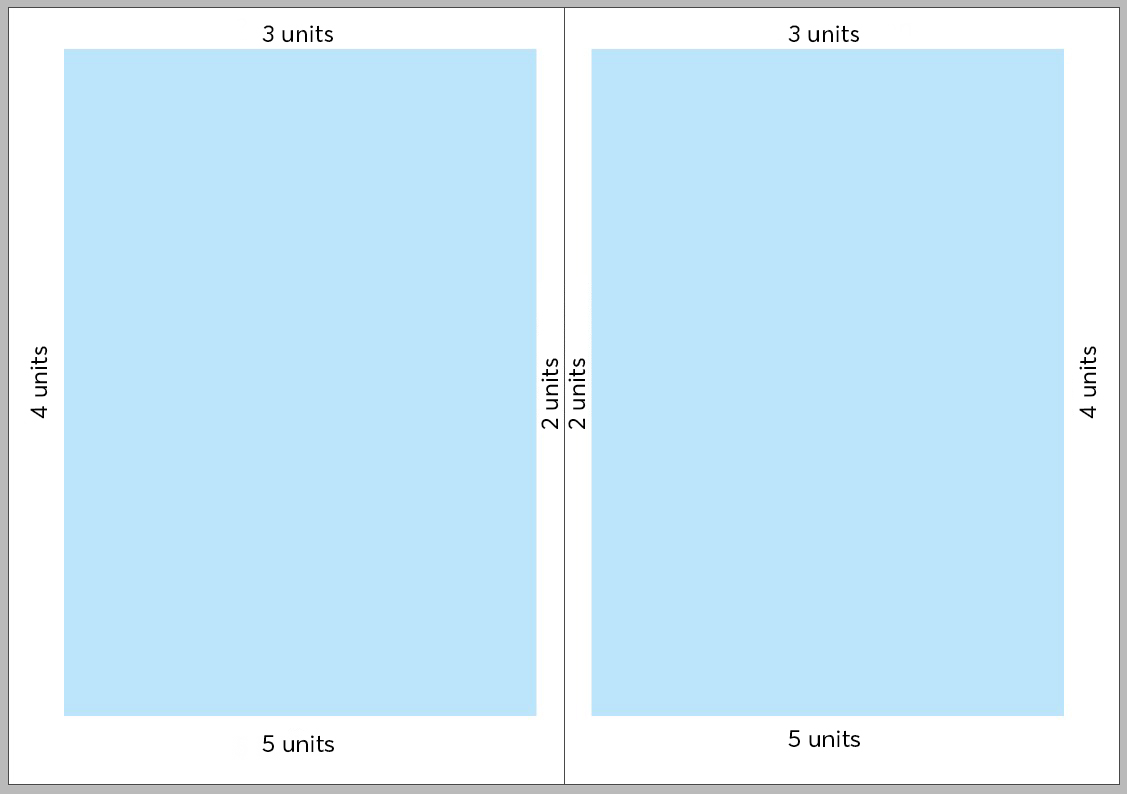
The inside margin is always the smallest. Afterwards, the margin size increases, clockwise for a right page and counter-clockwise for a left page. Applying the numerical sequence to margin sizes, we get 2 units for the inside margin, 3 units for the top margin, 5 units for the outside margin and 8 units for the bottom margin. The size of units can be custom defined based on the amount of content, the product and the target audience.

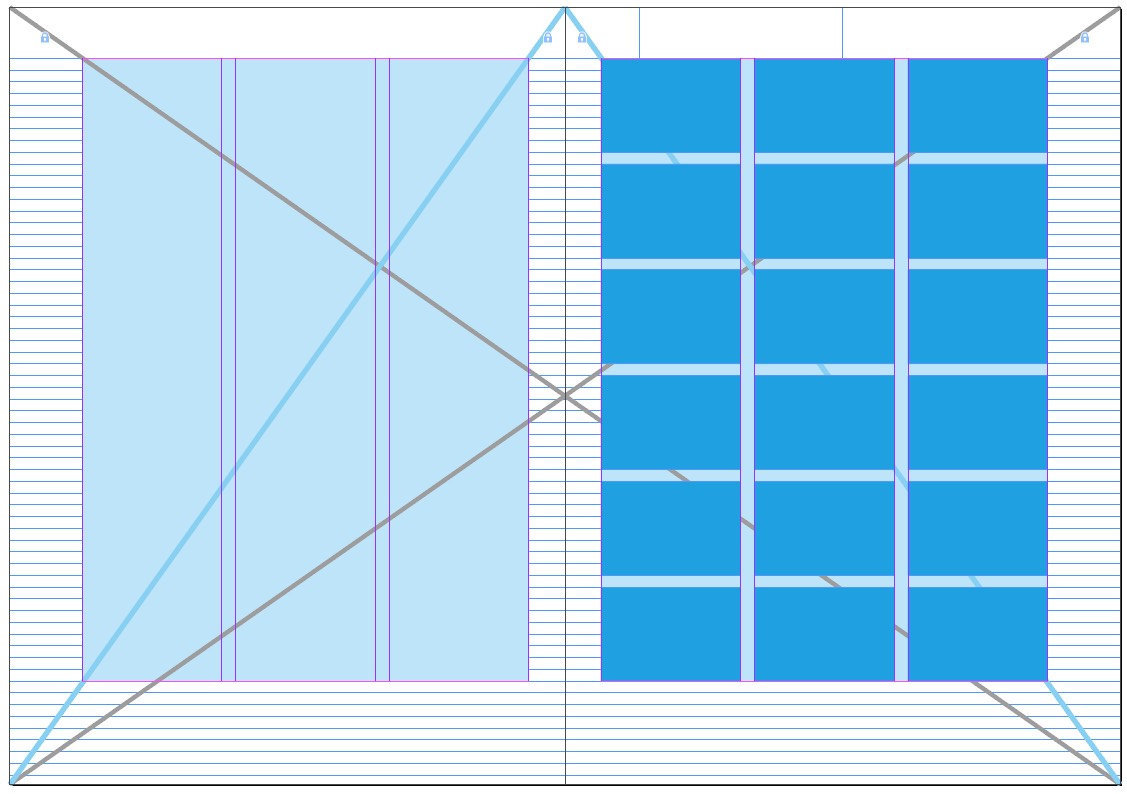
Type area using the line construction method
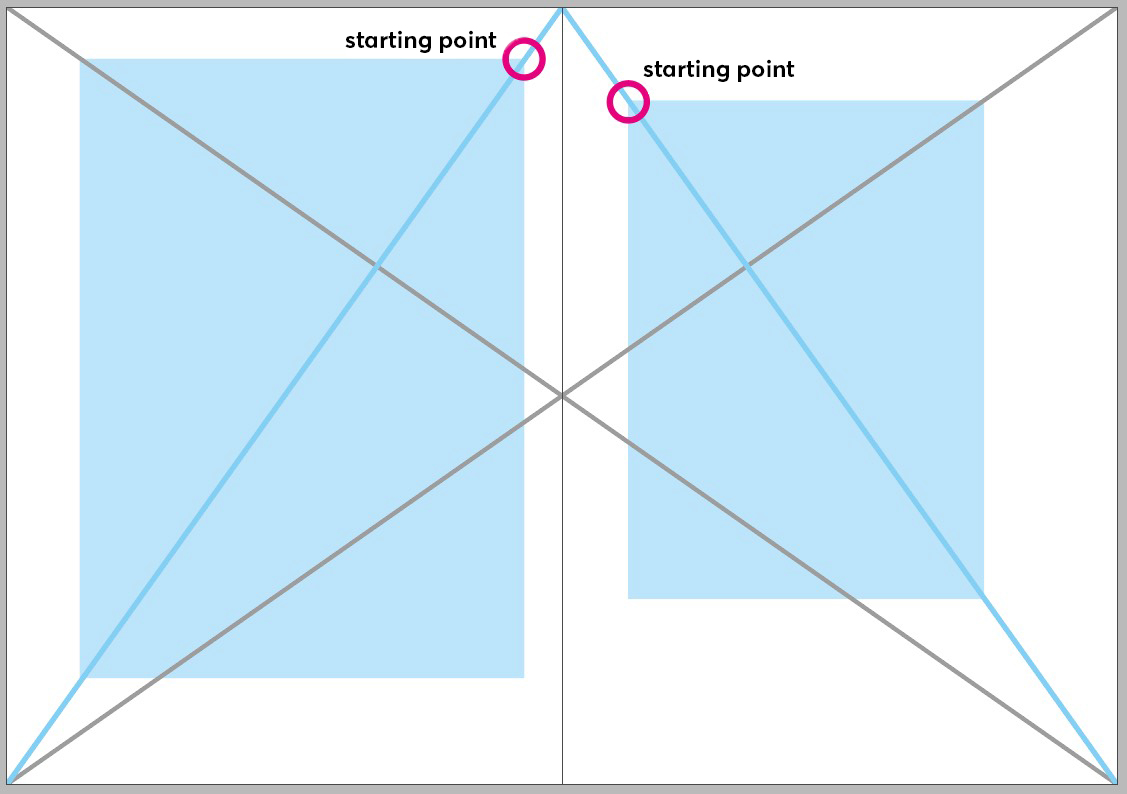
This method uses diagonal lines to produce a type area. The final size is variable with this approach. First draw two diagonal lines across the full spread, then one diagonal in each single page from the outer bottom corner to the inner top corner. To define the upper left starting point of the type area, take any point on the right single page diagonal. From there, draw a horizontal line to the right until you meet the full spread diagonal. From there, travel down vertically as far as the single page diagonal and from there draw a horizontal line to complete the rectangle. This may sound confusing, so take a look at the illustration below for clarification.
You can change the size of the type area at any time by moving the upper left starting point on the right single page diagonal further up or down. Move it up to increase the type area, while keeping the proportions, and move it down to reduce it.
Plan B
If you need help with the size, you can draw an additional line: After creating all four diagonal lines, start a vertical line in the point where the single page diagonal and the full spread diagonal meet and draw it up to the page edge. From there start another line that runs to the intersection point of the other page. This creates a new intersection point between the last line and the single page diagonal – and this is the upper left starting point for the type area rectangle.

Page construction using the number sequence
The number sequences 2:3:4:5 and 2:3:4:6 can be used to define the sizes of the four margins in an easy manner. This method does not account for the ratio of paper width and paper height, however. Nevertheless, using the two number sequences delivers a quick an often handsome solution.
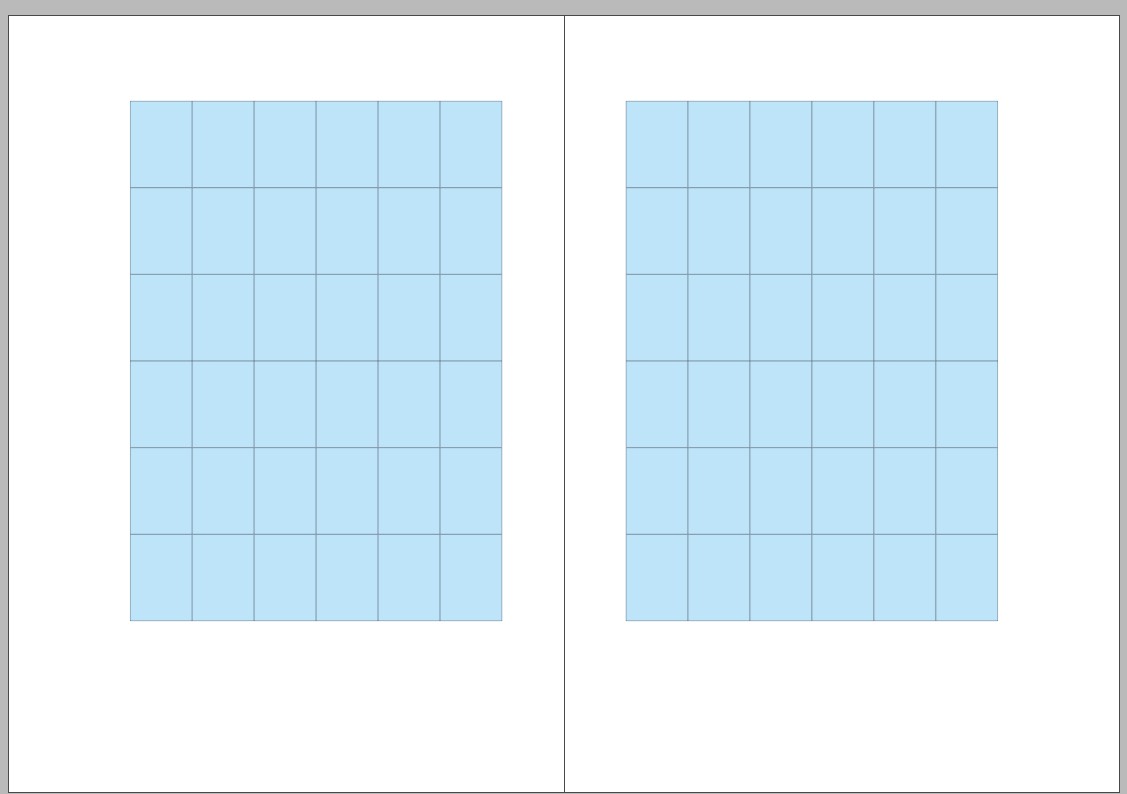
Page construction using the 9×9 grid
This method divides the page width and height into nine equal squares. Now leave one square at the top and at the inner edge, respectively, empty and two squares at the outside and bottom each. The drawback of this technique is the non-scalable margin width and the relatively small and hence fixed size of the type area.
The layout grid
Our type area, or rather the margin widths, specify the outer edges. But on the inside, the type area is still empty. But we need to structure the inside of the type area as well, especially in case of complex projects with intricate content and multi-page documents. So we use the layout grid to help us out.
The grid divides the type area horizontally and vertically into modules that make organising text and images easier.
Horizontal division
Let’s start with the horizontal division It is created by a column grid which divides the text in several columns plus the area between the columns, the gutter. In our example, we use a paper width of 200 mm and a type area using the diagonal construction. The resulting type area dimensions are
161 x 224,5 mm.
The type area width is divided into three text columns with a width of 50.3 mm and 5 mm gutter.
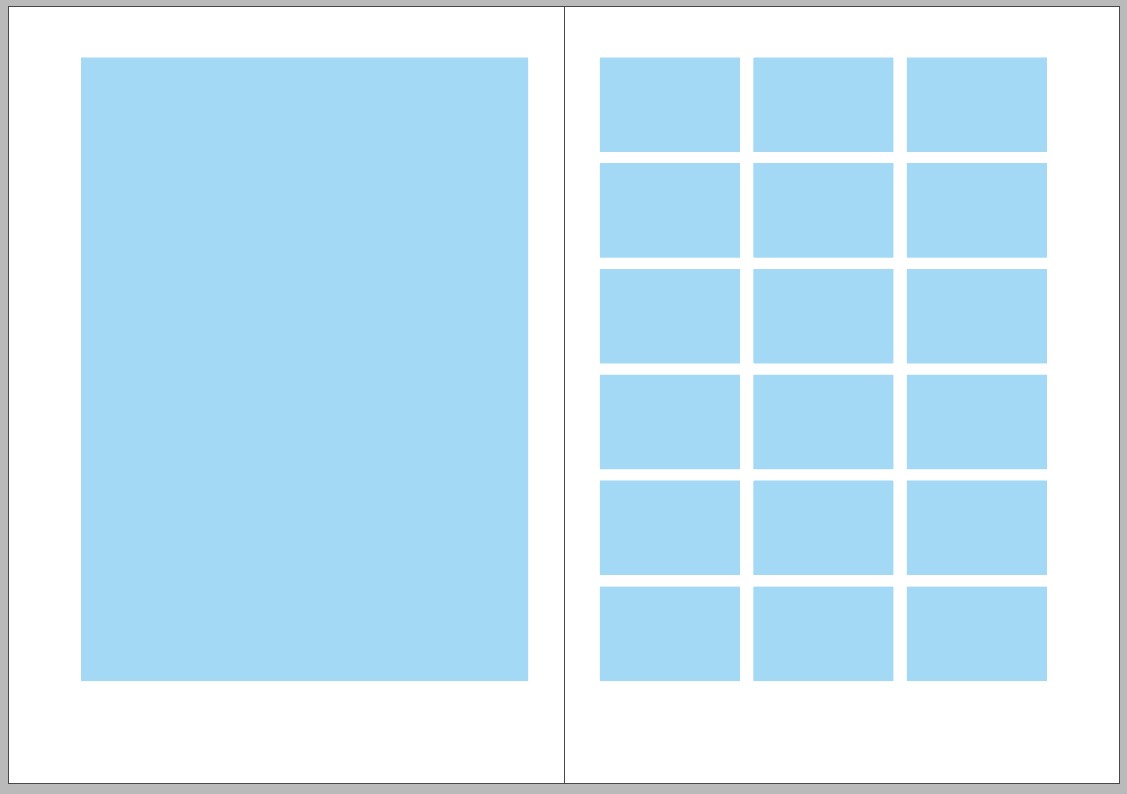
Vertical division
In vertical orientation, the type area height initially specifies the column height which should be a multiple of the baseline grid, i.e., the line distance of the body text. We now divide the height as well to create cells. The cell height is usually determined by the cell width to create a harmonious horizontal format. Frequently, the smallest image size is used to determine the cell size. However, the cell height must be so that multiple cells on top of each other end exactly at the lower edge of the type area – the height of the type area is therefore always a multiple of the grid cell height.
Grid cells
The cells now fill the entire type area and facilitate positioning objects and defining sizes. Images or boxes, for example, now move in grid cell increments. The smallest image or the smallest box has the size of a grid cell. Larger images are always multiples of the grid cells.
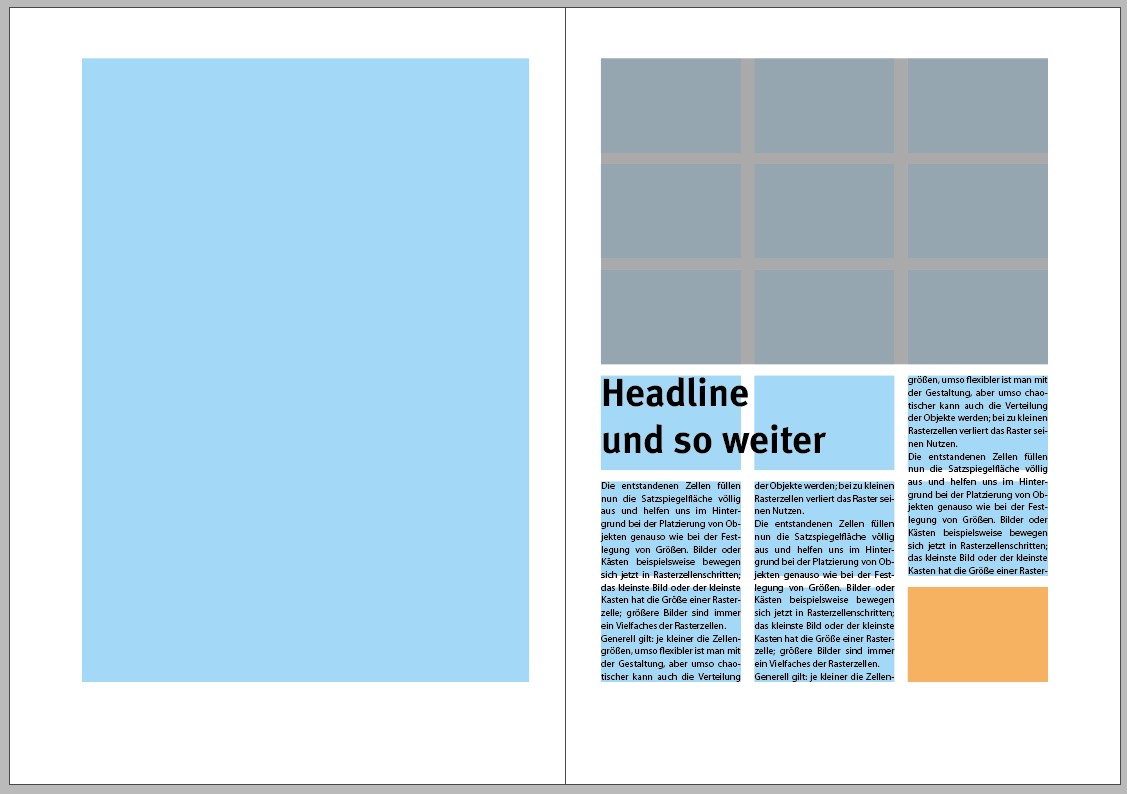
As a rule of thumb, it can be said that the smaller the cell size, the greater the design flexibility but the more chaotic the arrangement of objects can become. If the grid cells are too small, the grid is no longer useful.
A type area sample calculation
Let’s clarify this with a type area calculation. This also shows that you cannot always calculate to the millimetre. Rather you should try to keep your type area and the layout grid flexible. Let’s assume the following:
Paper size: 200 x 280 mm
Body text: 9 pt font size, 12 pt line distance
According to the type area drafts described above, our planned type area height is approximately 210 to 230 mm. Using the line construction method, we would obtain a type area height of 225 mm.
We now divide the 225 mm height by the 12 pt of the baseline grid, i.e., 4.236 mm which equals 53.11. But we need an exact multiple of our baseline grid. So we round to 53 lines and reduce the type area height to 53 * 4.236 = 224.5 mm.
If we have 53 lines, 6 grid modules each containing 8 rows plus one row of gutter are ideal. Hence, we have 6 grid modules * 8 rows = 48 lines plus 5 rows of gutter = 53 lines = 224.5 mm.
Let’s draw a brief interim conclusion. We calculated the following values for our page:
- Grid: 6 grid modules comprised of 8 rows each
- Division: 53 rows of 12 pt each
- Effective type area height: 224.5 mm
What is the size of the top and bottom margin? This can be calculated as follows:
280 mm (paper height) – 224.5 mm (type area height) = 55.5 mm remain for the top and bottom margin.
The margin proportions according to Fibonacci: 55.5 mm / 8 x 5 = 34.7 mm for the bottom margin; 20.8 mm for the top margin; alternatively we take the margin proportions of the line construction which yields 37.1 mm for the bottom margin and 18.4 mm for the top margin.
- Top margin: 18.4 mm
- Bottom margin: 37.1 mm
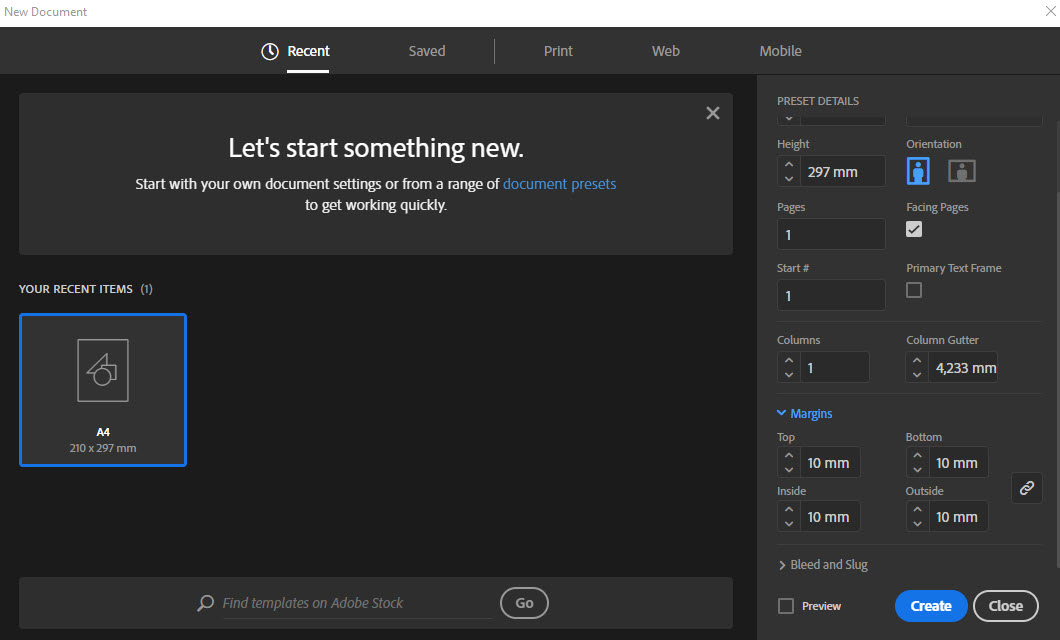
Generating the design grid in InDesign
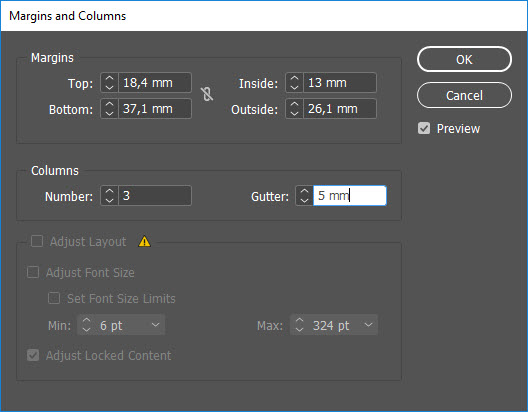
In Adobe InDesign, the type area is determined by entering the margin widths. The values can be entered either at the beginning when creating the file or later with the file open.
If you enter the values subsequently, pay attention to which pages are active when you open the dialogue box, because only the margins of the open pages will be changed!
To set all pages of your document, double-click on A-Master in the Pages panel to display the Master Page and activate the second Master Page in case of a facing page document. Afterwards, open the dialogue box to enter the margins via Layout > Margins and Columns.
Creating a grid in InDesign
The grid modules can be created using grid lines. Alternatively, create light-coloured rectangles, put them on a separate layer and lock them. You can show these rectangles every time you need help positioning elements and hide them in the preview.
Special cases
There are certain circumstances under which the type area and the design grid have to comply with certain specifications. This is usually the case if parts of the content contain fixed measurements as is the case with ads. The customer purchases an ad of specific width and height which the designer must integrate in the type area. Ideally, the smallest ad size is identical to a grid cell and the larger ads correspond to several grid cells. In practice, however, it is often the other way round and the grid cells must comply with the height and width proportions of the ad.
- Before generating the type area and the design grid, check the possible ad sizes.
- The proportions of a grid cell do not have to be the same as those of the ad. A square ad, for example, can also be comprised of 2 x 3 grid modules.
- When in doubt, use small grid cells to be more flexible.
Type area templates
Type area layout is not an easy task, especially for beginners. Therefore, we have created several templates in all calculation types as an InDesign file which you can download here for free. The key data:
- A4
- 200 x 280 mm
- in two sizes depending on the type area
Downloads
Golden Ratio type area templates:
Download A4 type area template
Download 200 x 280 mm type area template
Diagonal/line construction type area templates:
Download A4 type area template
Download 200 x 280 mm type area template
Number series type area templates:
Download A4 type area template
Download 200 x 280 mm type area template
9×9 modular grid templates:
Download A4 type area template
Download 200 x 280 mm type area template
Credits: Rawpixel.com/Shutterstock.com