Colour profiles ensure a consistent and predictable print result on different types of paper. All you have to do is install the latest ICC profile versions and embed them in your artwork.
In September 2015, several colour profile standards were revised and published by the International Color Consortium (ICC). Today, the use of ICC profiles is commonplace in the graphics arts industry and we at Onlineprinters also use them to produce higher quality prints.
Content:
- Why colour profiles?
- Step 1a:Installing ICC profiles (new version 3)
- Step 1b:Installing ICC profiles (old version 2)
- Step 2: Defining InDesign colour settings
- Step 3: Defining Photoshop colour settings
- Step 4 (optional): Standard black vs. rich black – displaying black in InDesign
Why colour profiles?
Each device has its own individual colour space that it can display. This is why images look different on a monitor, poster or in a brochure.
When it comes to printing, paper types are challenging because of their different colouring and texture. The same print ink and artwork can look completely different depending on the paper stock. Colour profiles aim to create consistent and predictable colour results on different devices by accounting for the characteristics of paper types and printing techniques.
To achieve this, the International Color Consortium (ICC) develops colour profiles for different media. The ICC profiles can be downloaded for free (more on this later). They are compatible with Windows, Mac OS and any other standard operating system. However, ICC profiles are usually not installed on your computer by default so you have to do this manually. Also, you have to embed the ICC profiles in your layout program. We will explain how to do this later in this article.
ICC profiles are continuously developed further. The colour profiles relevant for print shops (PSO coated & uncoated) have been available in an updated version since 2015. The latest version 3 of this standard promises even better colour reproduction, especially on natural papers. But the 12647-2:2013 printing standard also specifies new requirements for measurement technology, standard illumination and proof papers.
To print on coated papers such as art paper, Onlineprinters needs the PSO coated v3 profile. For uncoated paper stocks such as offset and natural papers, we apply the PSO uncoated v3 profile. See the “Data note” tab on the product page for information on the required colour profile.
Installing the new ICC profiles (version 3)
The colour profiles for coated and uncoated papers are relevant for printing. The free ICC profiles are provided by the ECI (European Color Initiative) and can be downloaded as a ZIP file here:
Alternatively, the profiles are available on the ECI website under Downloads Exchange color space eciCMYK. The profiles are also known as FOGRA 51 and FOGRA 52
Extract the ZIP file using a suitable program. The further installation process depends on your operating system.
Installing colour profiles on Windows
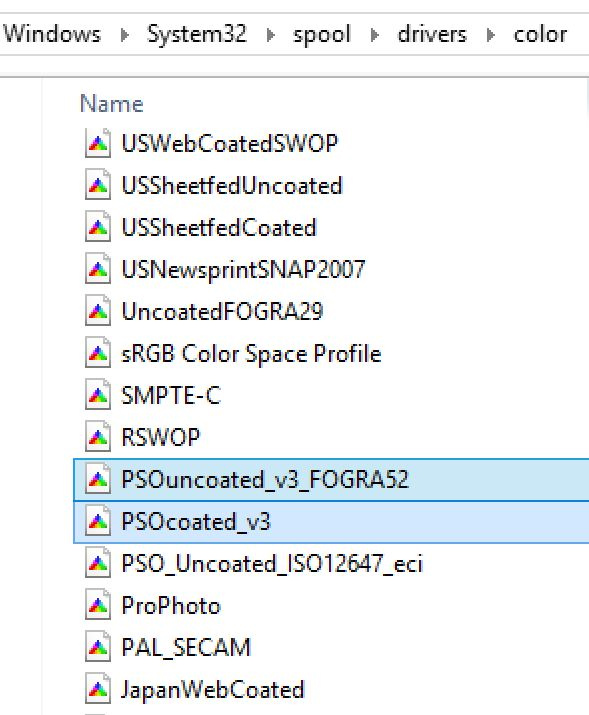
Open the extracted folder. Right-click on the corresponding colour profile to open the Install profile dialog box. Click the left mouse button to confirm. Repeat the process with a different colour profile. Done!
Alternatively, you can manually copy the colour profiles into the following Windows folder: \WINDOWS\system32\spool\drivers\color
Installing ICC profiles under Mac OS
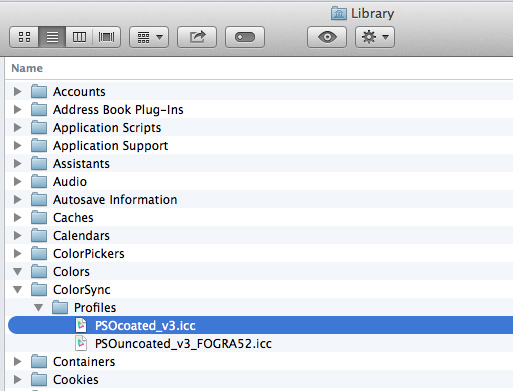
Select the colour profile in the corresponding extracted folders and copy it.
Paste the colour profile either in the folder under
/Library/ColorSync/Profiles
or in the folder under
/User/[User name]/Library/ColorSync/Profiles.
If you are unable to locate the Library folder, proceed as follows: Go to the Finder menu bar, click Go and then press the Alt key. The menu opens showing the Library item approximately in the middle. Select it and go to the ColorSync folder and then to Profiles.
After you have installed the new colour profiles, you have to embed them when setting up your artwork; read the profile installation instruction from step 2 below to learn how to do this.
Installing ICC profiles (older version 2)
ICC profiles of the older version 2 are installed the same way. This is not necessary for products from Onlineprinters, but is mentioned for the sake of completeness here.
Go to eci.org/en/downloads, scroll to the section ICC profiles from ECI (old versions) and download the “eci_offset_2009.zip” file. Save and extract this file. Right-click the file to choose between different extraction options.
You should install at least the following ICC profiles on your machine:
- ISOcoated_v2_300_eci.icc
- ISOcoated_v2_eci.icc
- PSO_Uncoated_ISO12647_ECI.icc
Installing ICC profiles on Windows:
Open the extracted folder eci_offset_2009 and choose the subfolder of the same name. Here you will find info PDFs and ICC files which Windows recognizes as ICC profiles.
Now right-click a profile and select Install profile. ISOcoated_v2_300_eci.icc, ISOcoated_v2_eci.icc and PSO_Uncoated_ISO12647_ECI.icc. Alternatively, copy the files into the Windows folder at \WINDOWS\system32\spool\drivers\color.
Installing ICC profiles under Mac OS:
In the eci_offset_2009 folder, choose the subfolder _MACOSX and the ECI_Offset_2009 folder in it. Copy the required profiles either to the folder under /Library/ColorSync/Profiles or to /User/[user name]/Library/ColorSync/Profiles.
You have now installed the most important ICC profiles on your operating system and can make the necessary settings in Adobe InDesign and/or Photoshop. Further on in the guide, choose “ISO Coated v2 (ECI)” instead of “PSO Coated v3” and “PSO Uncoated ISO12647” instead of “PSO Uncoated v3” if you need the older colour profiles.
Installing InDesign colour settings
Once you have installed the ICC profiles on your computer, they are basically available to all applications. Usually, you don’t need to restart your computer but you may have to restart the individual Creative Cloud applications after the installation.
Important: After installing colour profiles, you may have to restart Adobe programs to use the colour profiles.
Making global default settings
You define the global colour settings in Adobe InDesign by defining the downloaded ICC profiles as colour working spaces. And here’s how to do this:
Click Edit > Color Settings
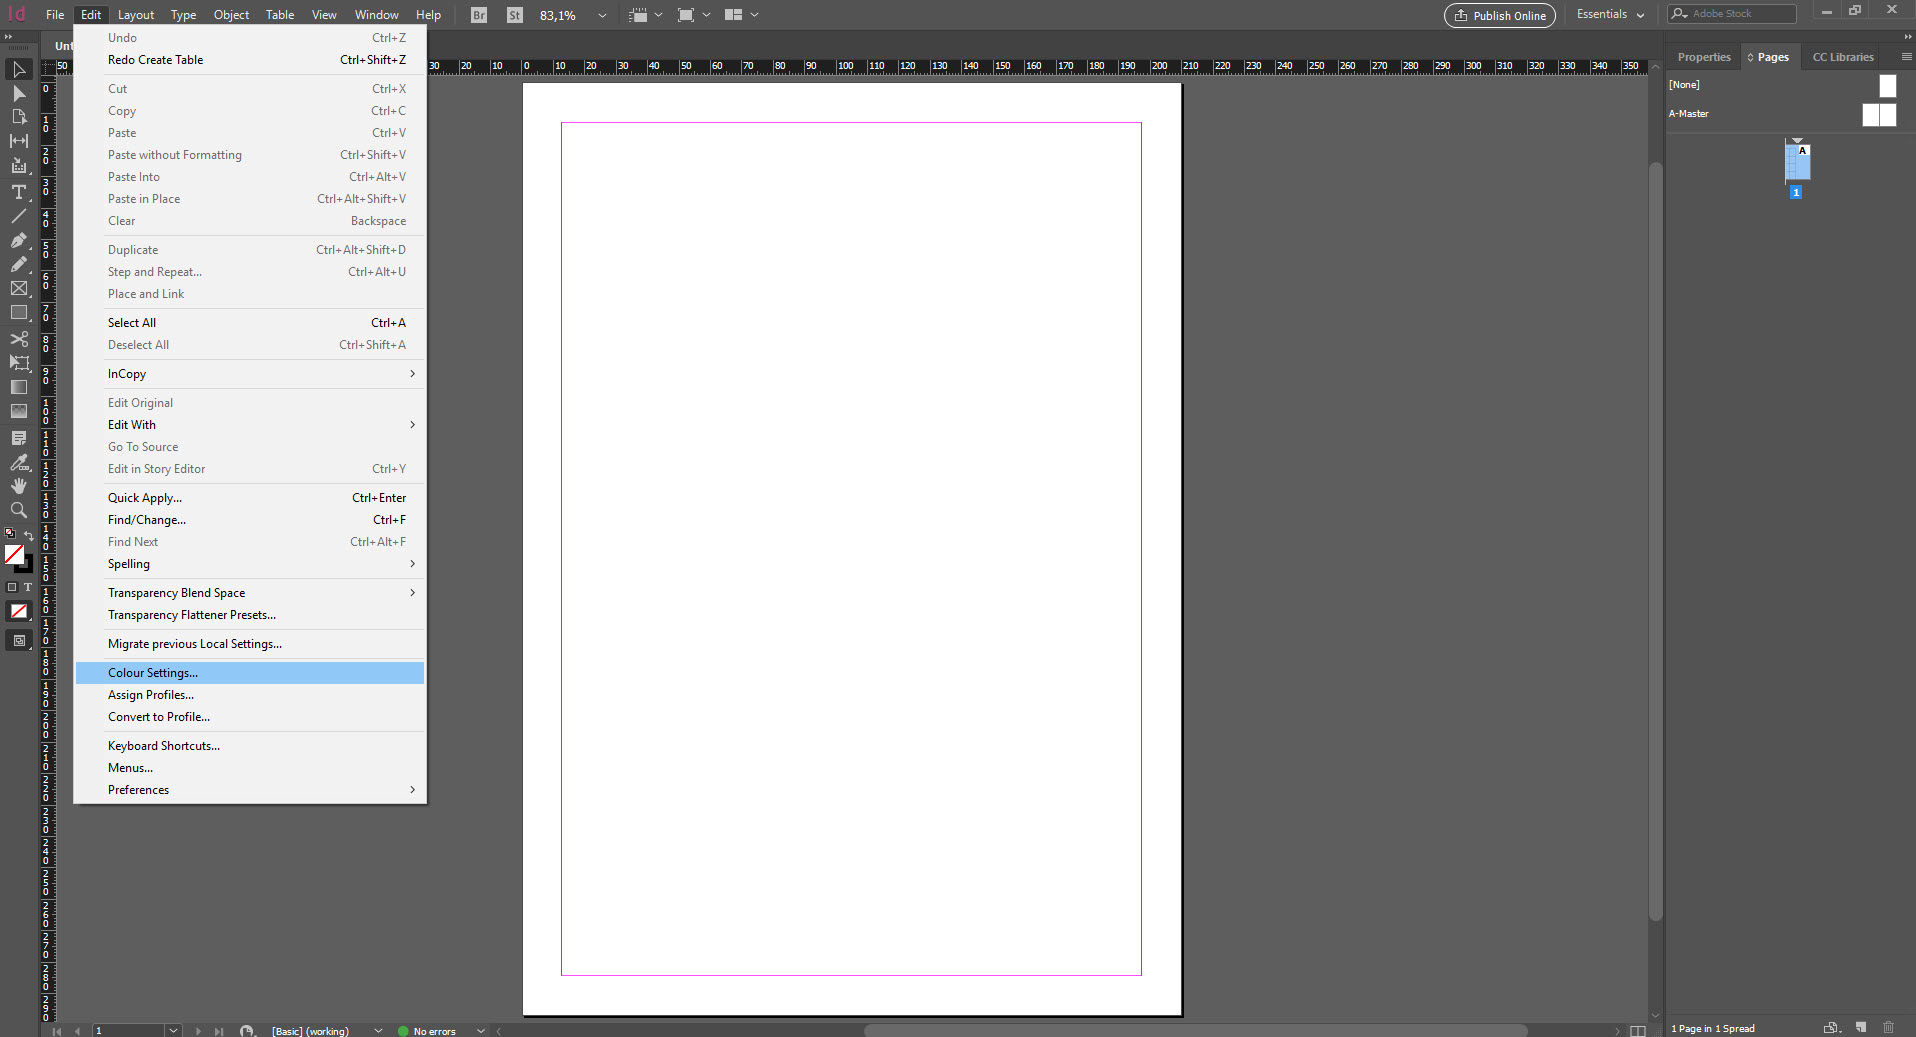
to open the Color Settings dialog box:
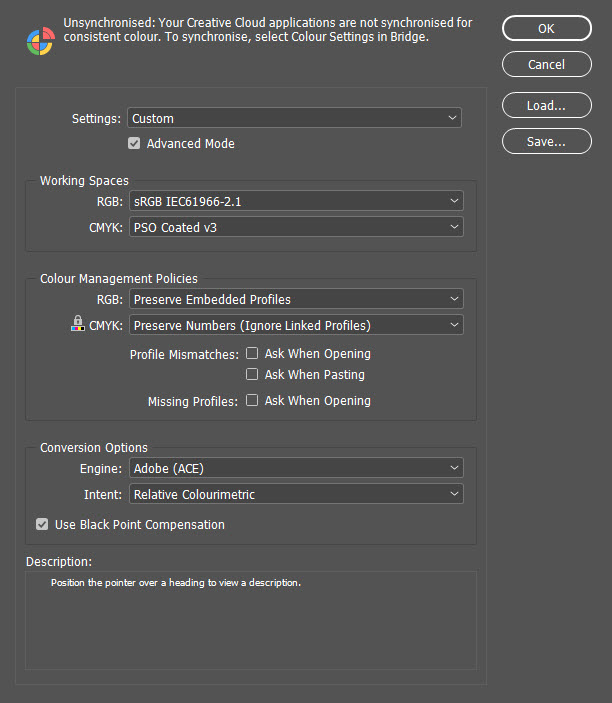
Make the following settings:
- Settings: User defined in advanced mode
- Working Spaces:
- RGB: Adobe RGB (1998) or sRGB (smaller than Adobe RGB)
- CMYK: PSO Coated v3
- Color Management Policies:
- RGB: Preserve Embedded Profiles
- CMYK: Preserve Numbers
InDesign saves these settings automatically so they can be reused in future projects.
But you can also define colour profiles for each file individually and independently of the global default settings. This makes sense since you should use different profile data for uncoated papers, for example. Select the desired colour profile in the PDF Export dialog.
PDF export settings
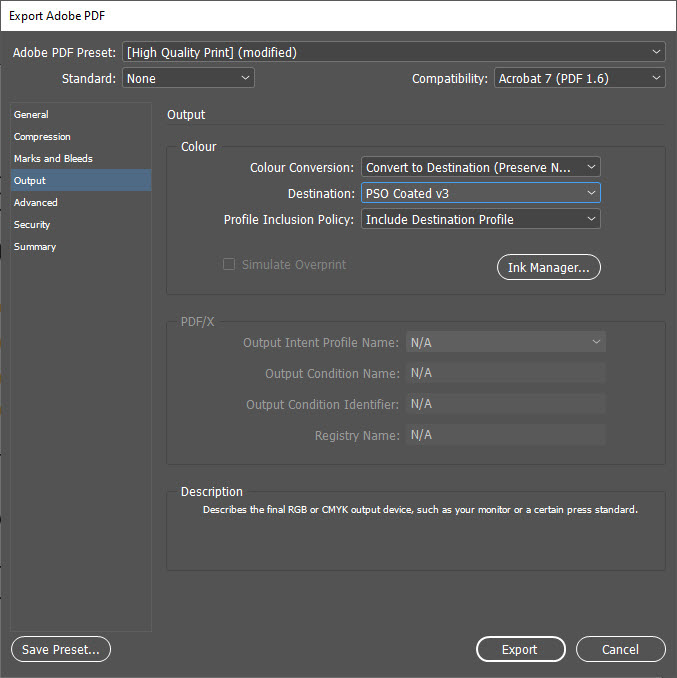
To generate an InDesign file for PDF export, click File > Export. Choose the Adobe PDF file format, enter a file name and click Save.
The Export Adobe PDF dialog box opens. Click Output. Now choose Convert to Destination (Preserve Numbers). The destination is the colour profile for your printed product (coated v3 or uncoated v3).
The export dialog contains additional settings that are relevant for creating artwork. We will explain them in detail in the article How to export print-ready PDFs.
Setting up colour profiles in Photoshop
To set up the colour profile in Photoshop, proceed as follows:
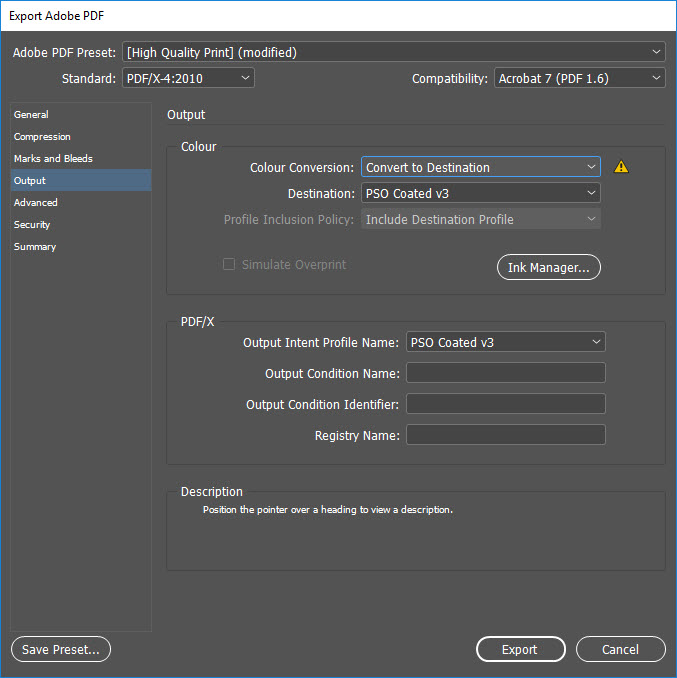
Click File > Save as. Choose the Photoshop PDF file format, enter a file name and click Save.
Click Output in the following dialog box. In the Color panel, choose Convert to Destination in the Conversion Options drop-down list box. Under Destination, you can now choose the required colour profile (coated v3 or uncoated v3).
Note: Other settings may be required to generate print-ready PDF files. For more advanced information read the article on How to export print-ready PDFs.
In Photoshop you can also install colour profiles globally. To do so, choose Edit > Color Settings. The dialog box looks slightly different but basically contains the same setting options as InDesign.
Standard black vs. rich black – displaying black in InDesign
Selecting the right black is another important setting in InDesign which you can make in addition to choosing the ICC profile.
Not all blacks print the same. It makes quite a difference in the print result whether you set up an object as K100 or C40 M40 Y70 K100 (example), a so-called rich black. By adding cyan, magenta and yellow, you can create a rich deep black or adjust it for warmer or cooler tones. K100 black is needed for plain body text.
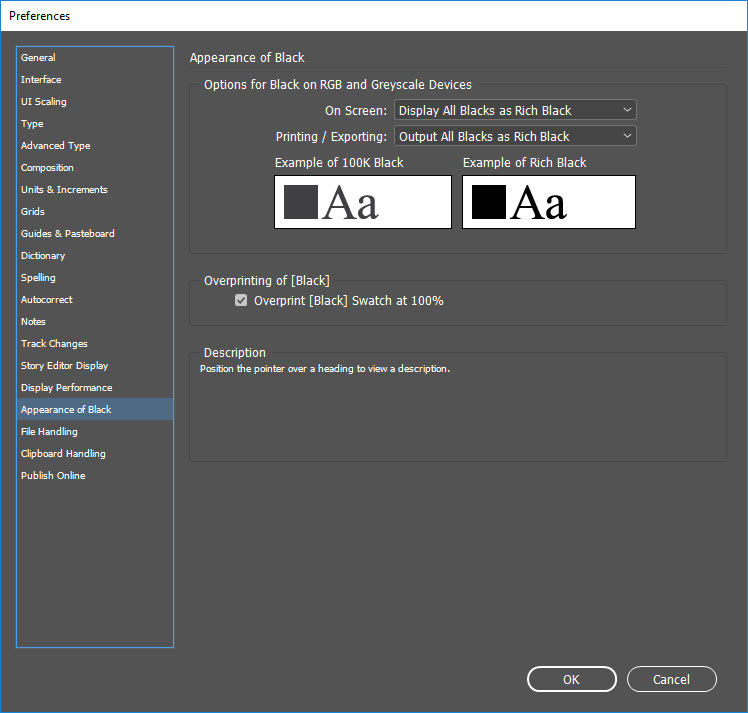
Don’t let yourself be fooled by InDesign which displays both K100 and rich black in exactly the same way. Instead, click Edit > Preferences > Appearance of Black
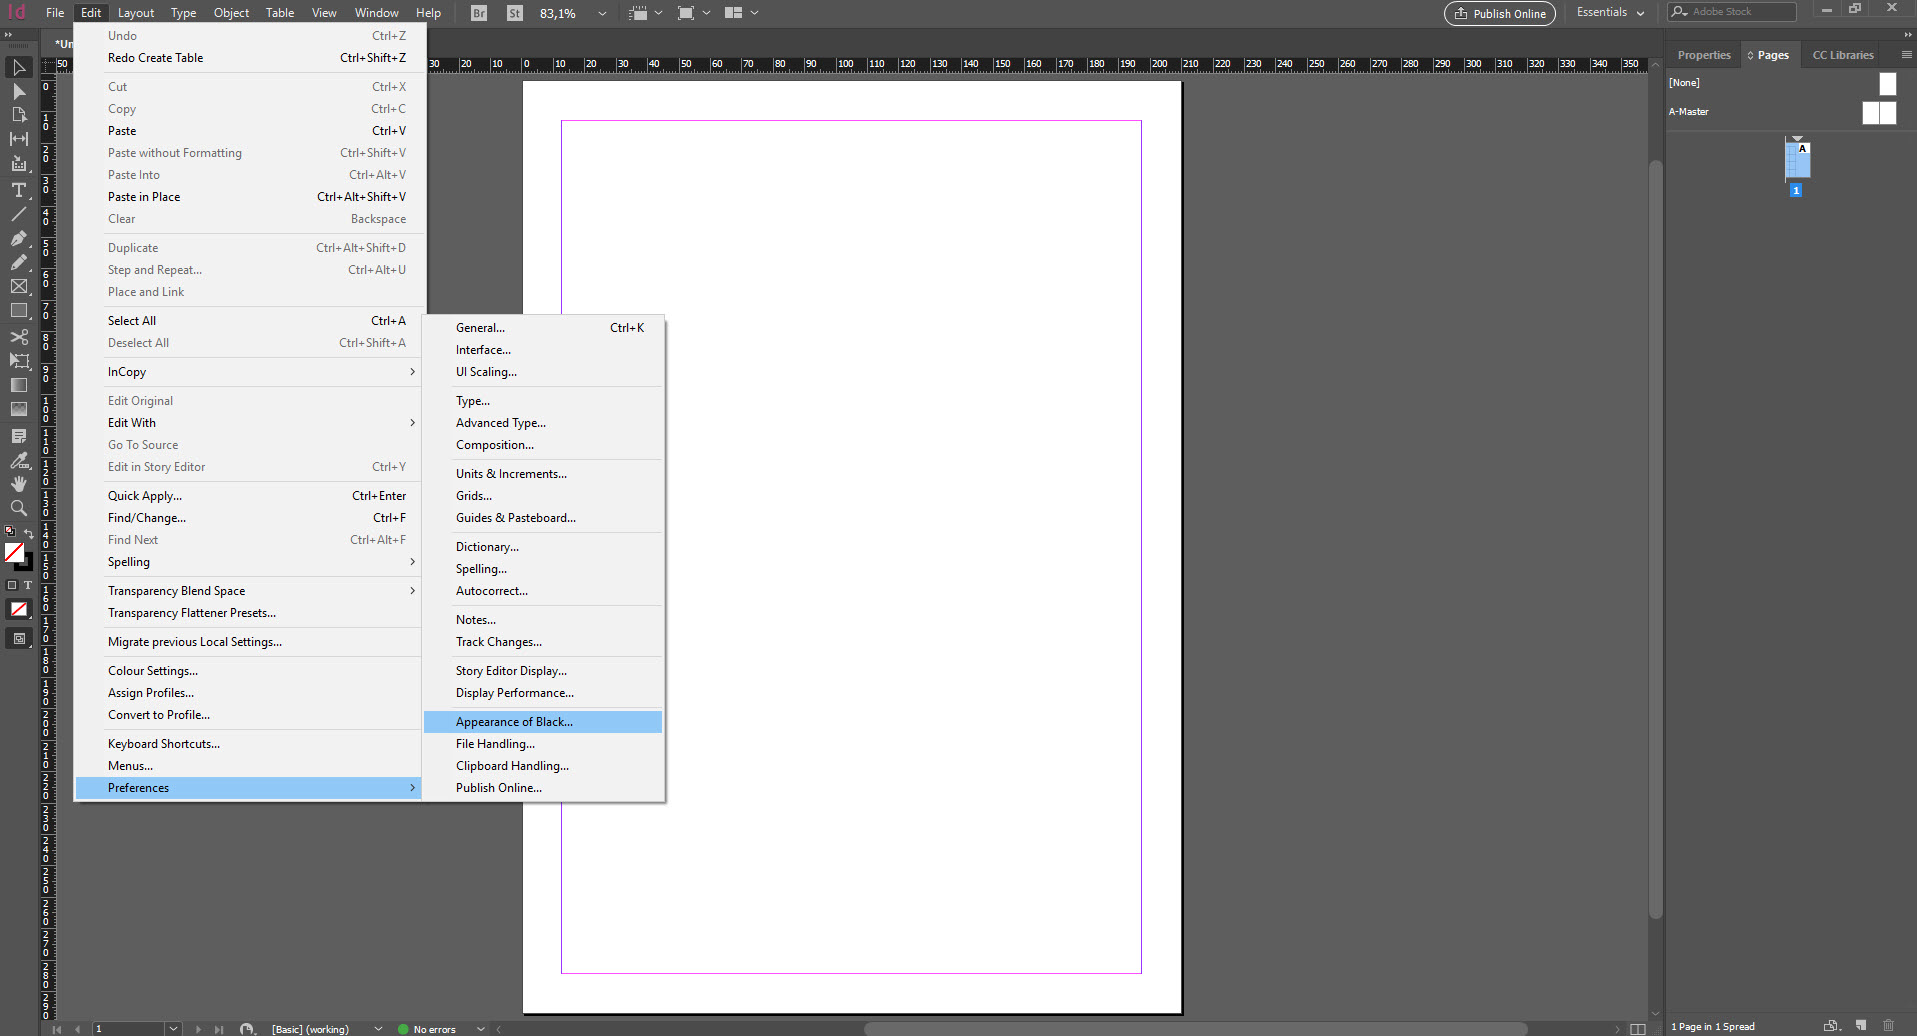
and set On Screen and Printing / Exporting to Display All Blacks Accurately.