Creating bulleted lists is the best way to show off a product’s benefits at a glance. InDesign allows bullet points to be added with one mouse click. But the options are much more varied than putting a bullet point in front of a paragraph.
Bullet characters help break up large blocks of text to present the content more clearly. There are so many customisation options that you can use bullet characters to add a certain style to your entire layout.
Which customisation options exist?
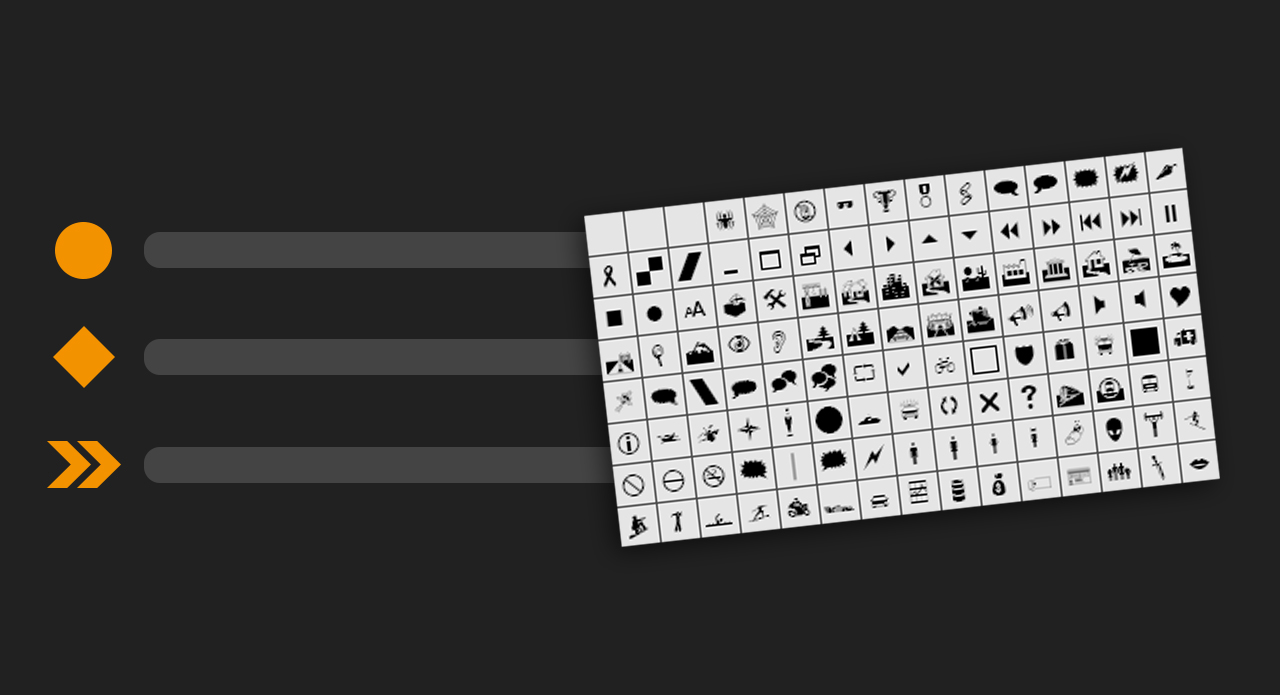
To use standard bullet characters in InDesign, a simple mouse click is all it takes. Alternatively, you can use any glyph from any typeface as a bullet point. Windows already provides an awesome selection of different glyphs with its “Wingdings” and “Webdings” fonts. Should these fonts not have what you are looking for, you can also use a custom glyph – which has to be imported as a graphic first.
Content:
- Adding standard bullet points
- Using tabs to add space
- Formatting bullet characters
- Colouring bullet characters
- Using custom graphics as bullet characters
Step 1: Adding standard bullet points
In our example, we want to use bullet points to structure a text block printed on the bookmark of a fictitious book shop. First select the text section to bullet and then click the Bulleted List button in the upper text formatting menu. If you prefer a numbered list, click the Numbered List button directly below it. A bullet character or number will then be added after each line break.
Step 2: Using tabs to add space
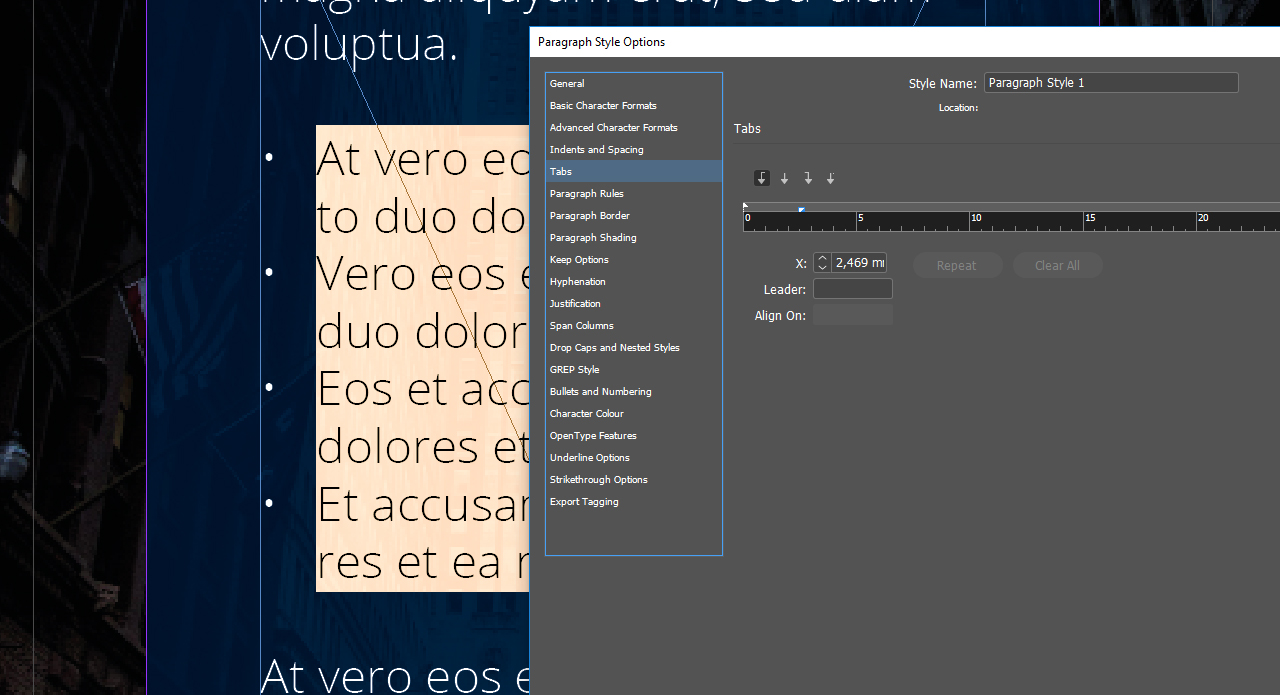
You need the Paragraph Styles panel to format the space between bullet point and start of list item. You can show it via Windows > Styles > Paragraph Styles. Before creating a new paragraph style, make sure that the correct text section is selected. This will cause the current formatting of the text to be applied when creating the paragraph style. Next double-click the new paragraph style. Choose Tab Position in the panel that opens.
A ruler allows you to set the space between the bullet characters and the start of the list item. First drag the left triangle over the ruler to the right and you will see the bullet points move accordingly in the background Then drag the right triangle to the left as far as possible to align the text and the bullet points with the rest of the text.
Step 3: Formatting bullet characters
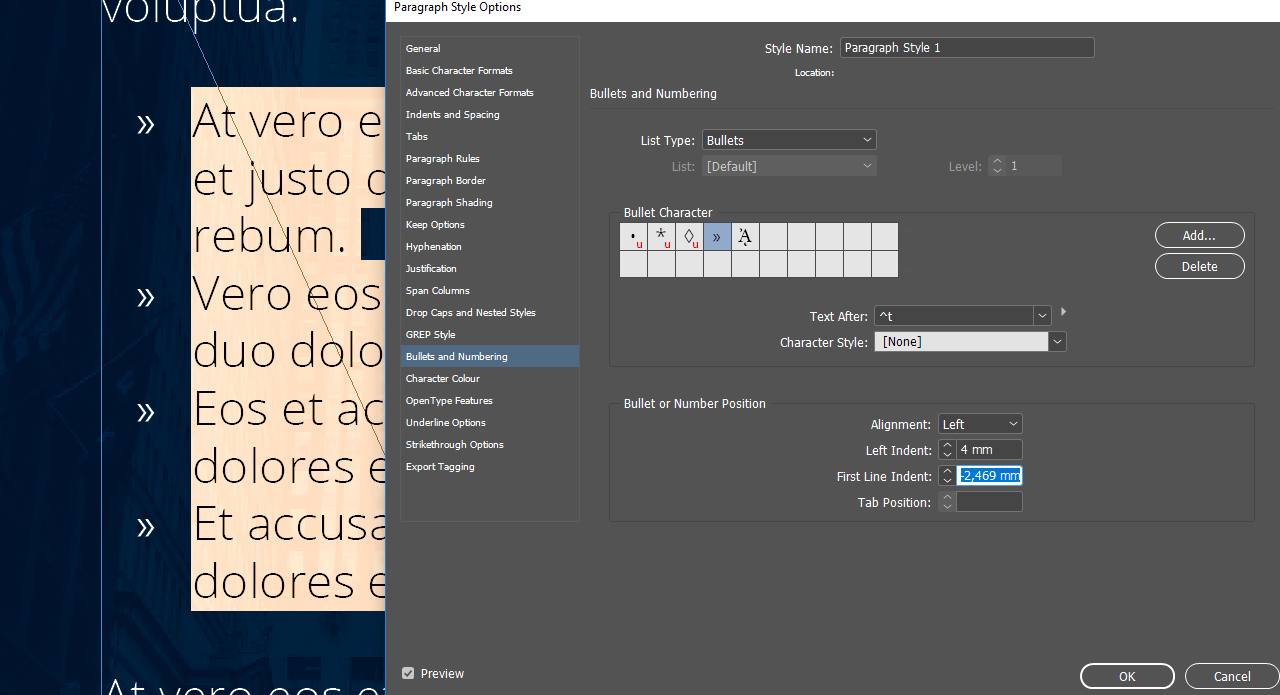
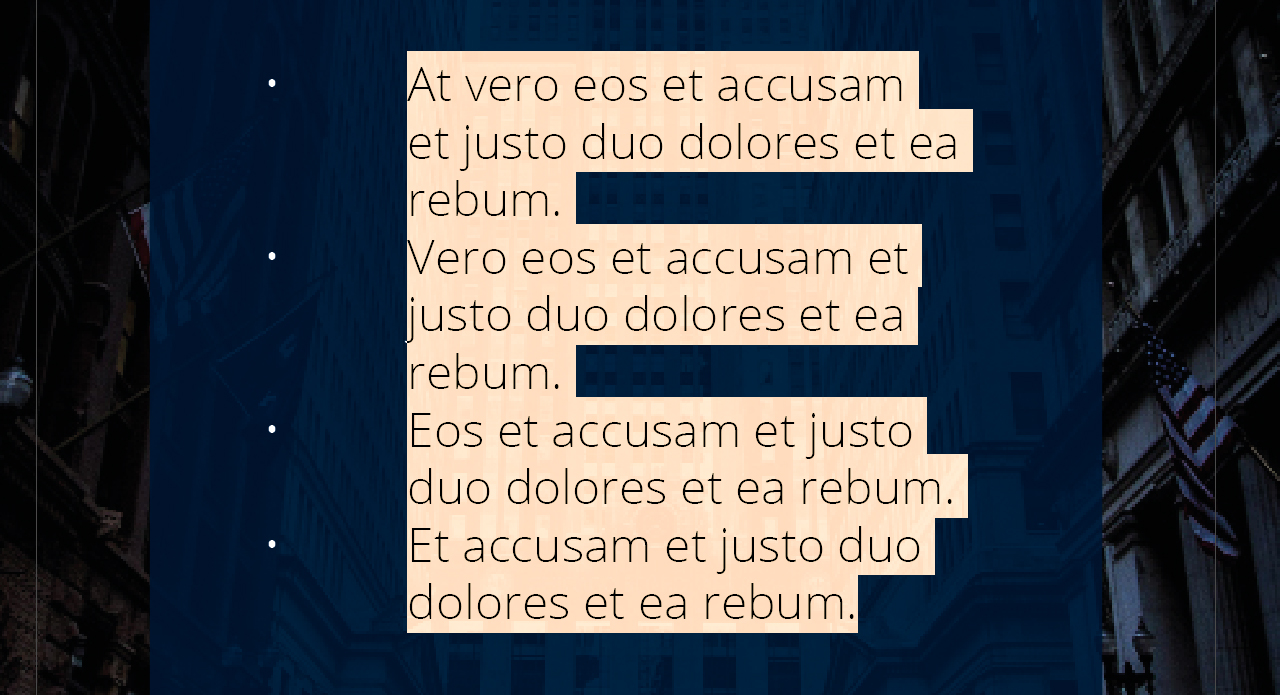
You can format the bullet points and replace them with other characters by clicking Bullets and Numbering on the Paragraph Styles panel. The List Type menu allows you to specify whether to use bullet points or numbers. Under “Bullets” you see four more bullet options you can use for your bulleted list. Click a bullet to apply it to all bullet items. We choose a double arrow to match the style of the bookmark.
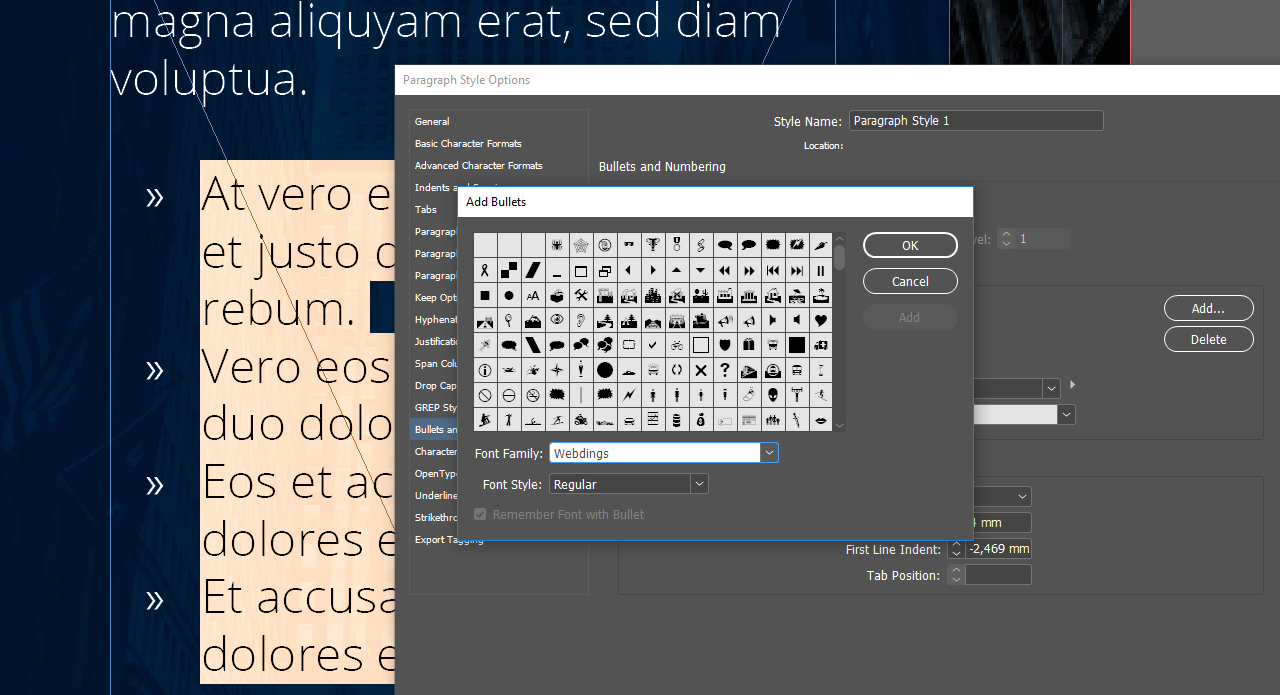
Click the Add button to select a glyph you want to use as bullet character from all fonts installed on your computer. Under “Text After” you can specify what to insert immediately after the bullet point or number. The “^t” means that a tab is set here by default.
In our example, we want to increase the left indent of the bulleted list. To do so, set the “Left Indent” in the Bullet or Number Position section to 4 mm. Then confirm your settings with OK. To reuse the formatting in further text sections, click Paragraph Styles and choose the newly created paragraph style here. This enables you to apply the style to all bullet characters instead of repeating it for each bullet.
Tip: If your style changes don’t immediately become visible, go to the Paragraph Styles panel and check whether the “Preview” checkbox in the lower left corner is enabled. This option must be checked in order to see what your changes do to the layout.
Step 4: Colouring bullet characters
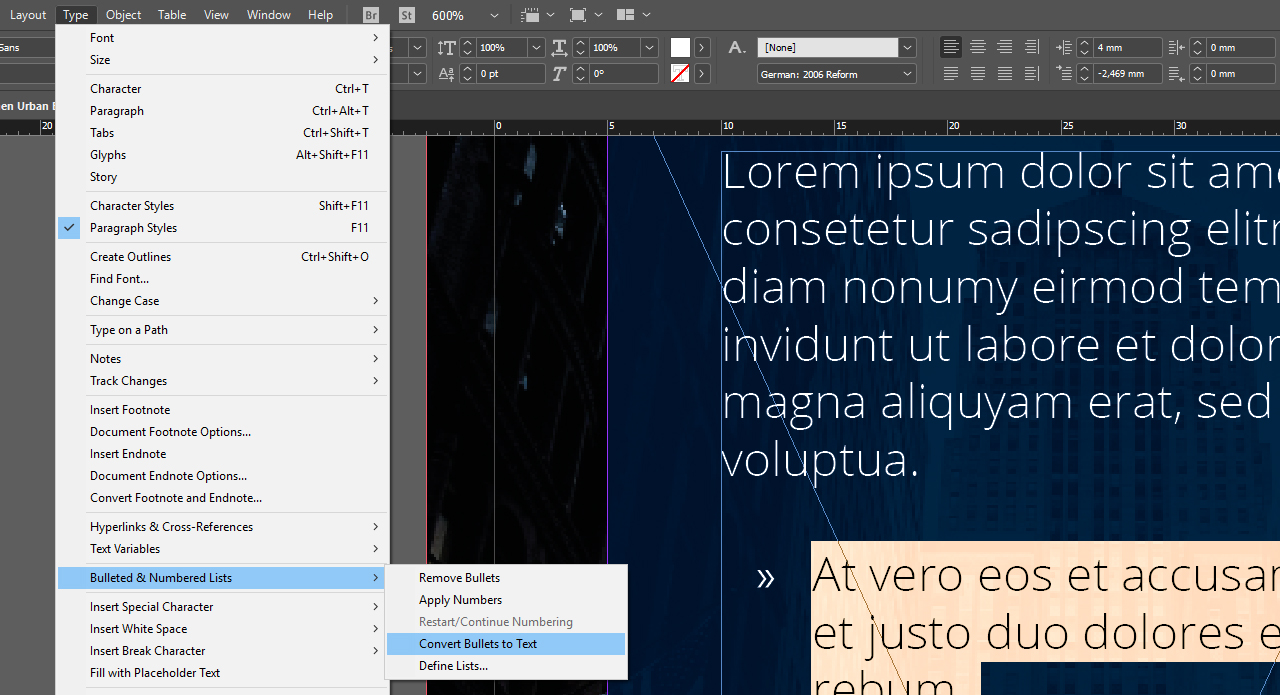
To colour bullet characters in InDesign, you have to convert them to text first. To do so, select the paragraph and click Type > Bulleted and Numbered Lists > Convert Bullets and Numbering to Text.

Subsequently, you can click each bullet character and colour it as preferred.
Note: After you have converted a character to text, you can no longer replace it with another character using the Paragraph Styles panel.
Using custom graphics as bullet characters
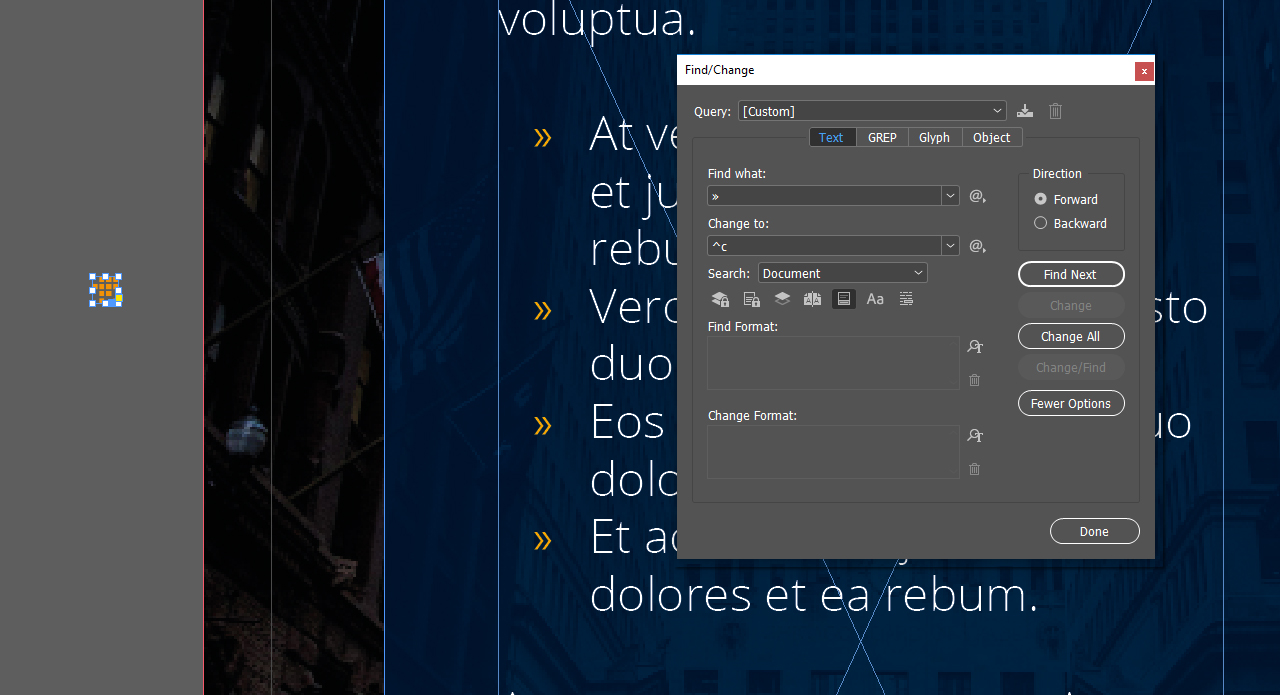
If you don’t find a suitable bullet glyph among the options offered, you can also use your own graphic. First import it into InDesign like a normal image and format it to the size of the bullet character. Then use the Ctrl + F shortcut to open the Find/Replace dialog box. Press Ctrl + C to select one of the bullet characters you want to replace. Press Ctrl + V to paste it into the “Find what” box.
Then select the pasted graphic you wish to use as a new bullet and copy it via Ctrl + C. Then click the @ next to the “Change to” box and choose Other > Clipboard Contents, Formatted. The text field should now contain “^c”. Next click Find.
InDesign should then find the first bullet point. Click Change All to replace all bullet characters with your graphic.