
Adobe’s update to Photoshop CC 2018 provides some exciting new functions. One of the most helpful new features is the “Select Subject” tool with this function, Photoshop lets you select the most prominent subject in an image in a single click. This is a relatively quick and easy way to cut out objects in Photoshop. In this tutorial, we will show you how well the new tool works and which advantages it brings.
Step 1: Proper image selection
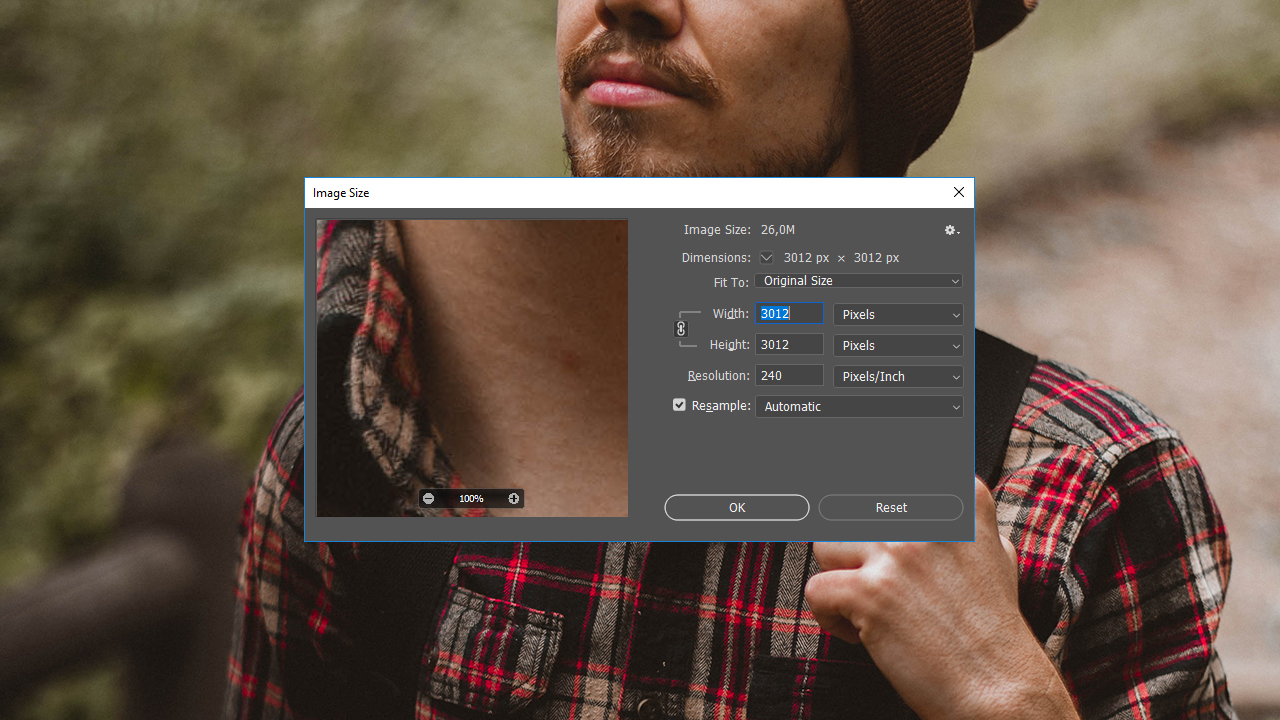
To obtain best results, your image should have maximum resolution and contrast between the subject to be cut out and the background. This is crucial to cut out subjects quickly and cleanly.
Step 2: Select the subject

To apply the new “Select Subject” feature in Photoshop CC 2018, first click Select and then Subject. Photoshop will now analyse the image and automatically select the most prominent subject. After a short time, a selection will appear around your subject. The automatic selection made by Photoshop is already very good in most cases. But sometimes you need to finetune the selection further. In this case, you can support Photoshop’s outline recognition.
Step 3: Support outline recognition
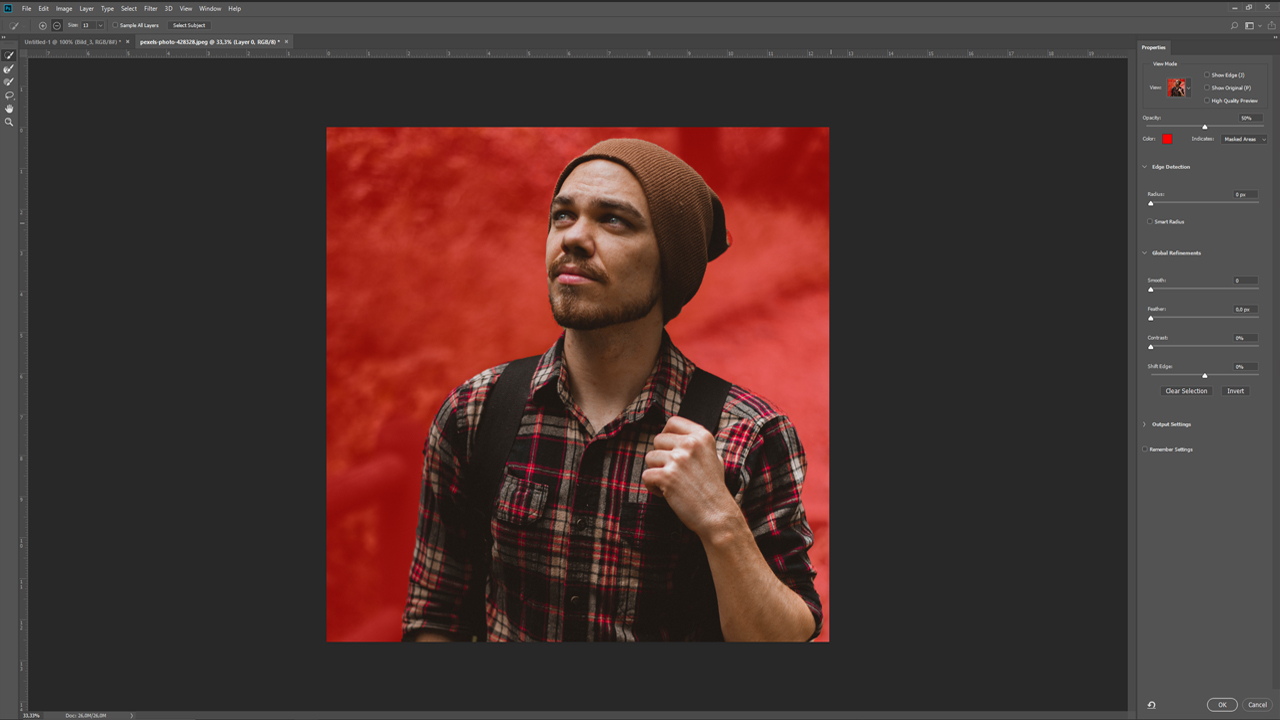
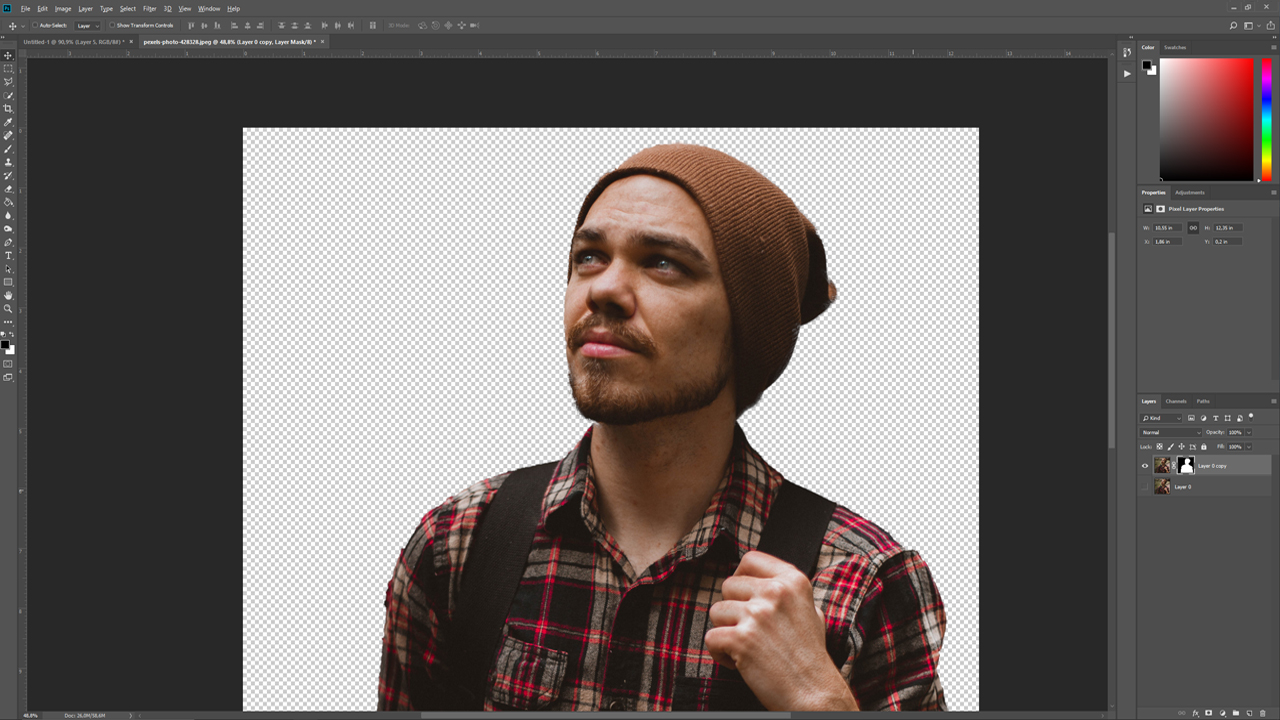
Click again Select in the menu and choose Select and Mask. You should now see a new window on the right and a panel with some new tools on the left. First set the view to Overlay in the right window to see the areas which Photoshop selected automatically. Everything coloured red will be removed.
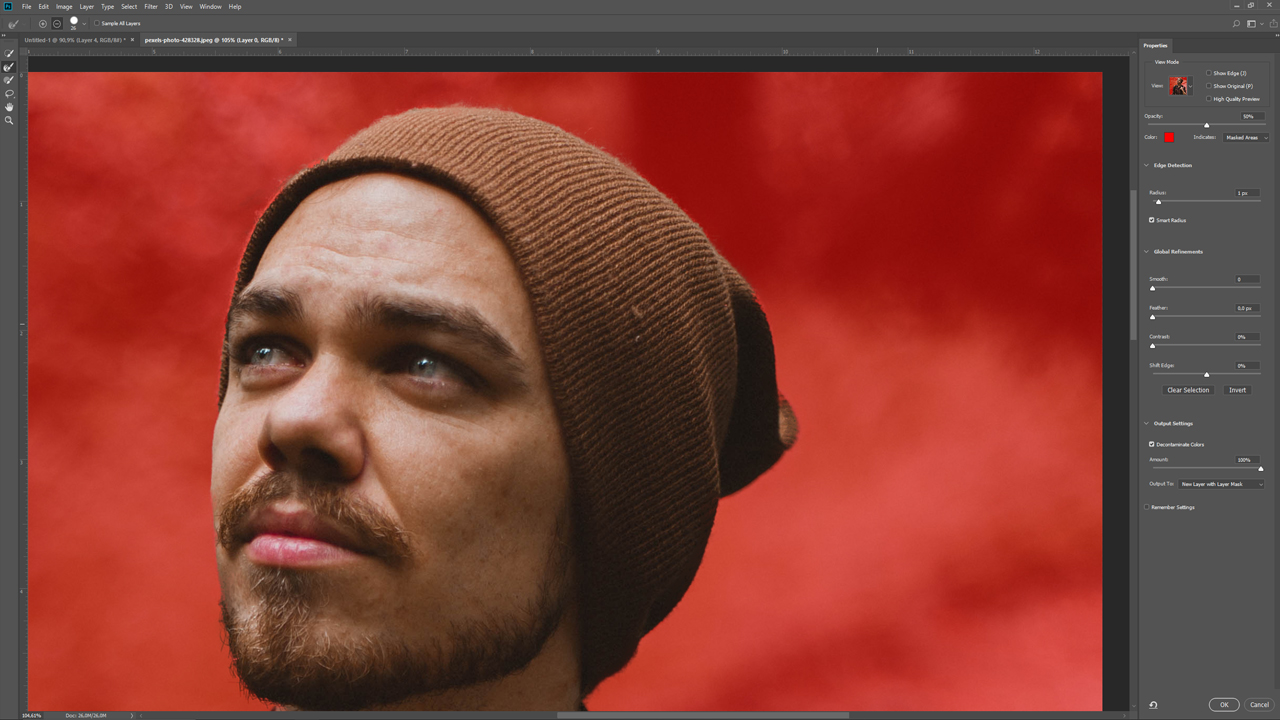
Next, use the tools in the left panel to refine the selection. This panel includes among others the Quick Selection tool to recognize outlines and the Refine Edge tool to select delicate objects such as beard hairs. Start with the Quick Selection tool and roughly cut out the desired areas. In the example, part of the hat was not selected correctly. You can use this tool to “paint” a selection using a round brush tip to make it easier for Photoshop to recognize the edge.
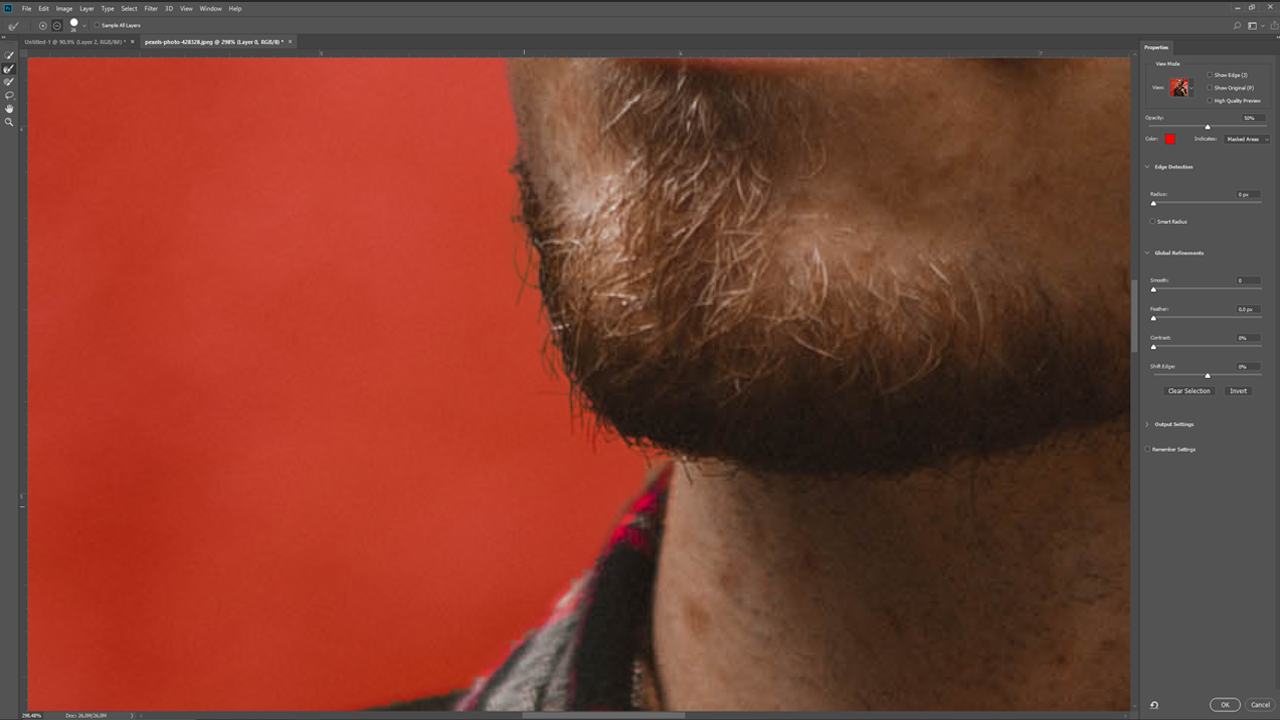
The beard hairs were also not selected ideally. To select the hairs, choose the Refine Edge tool and paint over the hairs as you did before. Which areas you have to rework largely depends on the subject. The more accurately you work, the better the end result will be.
In the right window, you can enable the so-called Smart Radius for a variable width refinement area around the edge of your selection. Set the slider to 1 px. You can also play around with the other sliders to fine-tune your result. In the example, the Smart Radius of 1 px is sufficient for the time being.
Step 4: Cutting out in Photoshop using an automatically generated layer mask
Next, open the Output Settings dropdown menu and enable the Decontaminate Colours option to further fine-tune the selection. At the same time, the output of your settings automatically changes to New Layer with Layer Mask. This is the optimal setting to prevent that image information gets completely lost or in case you want to make further corrections later on. This way, your original layer is preserved. Finally, confirm everything by clicking the OK button.
You now see the subject cut out by a layer mask. Next, you can place the subject on any background and continue editing it.

Credits:
By media designer Christoph Ullrich.